
Organizing anything can seem daunting if you don't have the proper guide to help you along the way. Let Scrapbook.com's founder Jill Davis and organizational expert Stacy Boatman be your guides as you treck through the organizational unknown in your craft space. Need supplies to help you along the way? Scrapbook.com's store has many products that are ideal for all of your craft storage and organization needs!
Materials Needed for Organizing Ribbon, Fiber, and Sewing Supplies
- Containers (varying sizes depending on needs) or Racks
- Label Maker
The Challenge of Organizing Ribbon, Fiber, and Sewing Supplies
Ribbon, fiber, and sewing supplies can be difficult to organize. Your challenge will be to organize them into a system that is easy to maintain and accessible. Also, you'll want to establish a place for where your sewing machine will live in your craft space.
If your space is cluttered with out-of-control ribbon, fiber, thread, etc., then an organizational plan is a priority, and any work that you get done will be beneficial. Knowing what your problems are, what needs to happen with them, and how you’re going to get these needs met will make all the difference in getting the “loose ends” of this challenge tied up. Very soon you will have a system that makes you happy every time you see and use it. If you love to organize, then you will find enjoyment from the sorting and rearranging required.
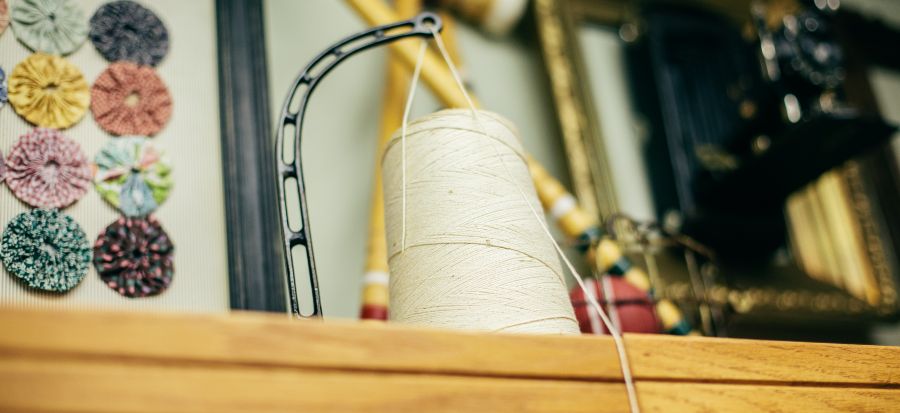
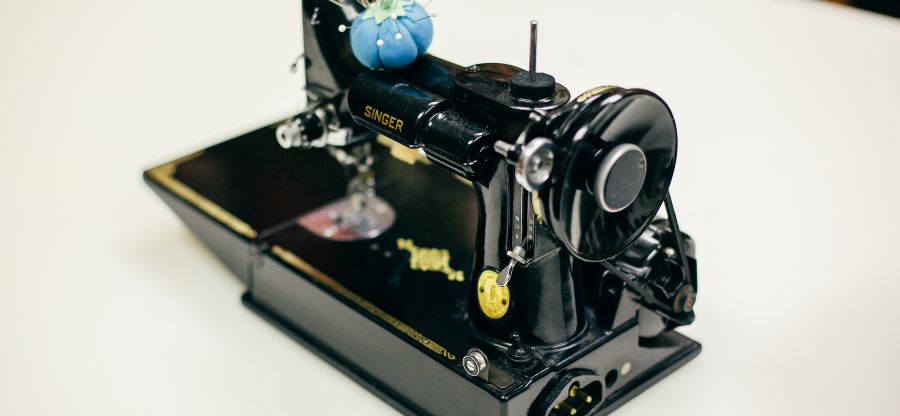
Many of us have sewing machines we use to add stitching to our projects. Where do you store spools of thread? Are they in a random drawer in a thread wad? In a box? In another room? How about bobbins, sewing machine accessories, scissors just for fabric, and your sewing machine? Your sewing machine case (or cabinet) and anything you use with it should be in a “sewing center” if you want your system to function optimally. Your machine can be in another room of your home, just get that space organized with everything you use while sewing, and you’ll be happier, I promise.
Organizing Ribbon and Ribbon-Like Material
Let’s begin with HOW to organize your ribbon. You can organize by the following options:
- Type (i.e. grosgrain vs. sheer)
- Color
- Width
- Packaging
Organize and plan with your scrapping style and work habits in mind. You can also mix and match. For instance, it's easy to group all red, grosgrain ribbon together.
Now lets take a look at WHAT to store your ribbon in. Both Stacy and I are not big fans of ribbon packaging. We’ve found that once you take ribbon out of its neat and pretty little package, it never goes back in quite the same way. We suggest you immediately pull all of your ribbon off cards, spools, bobbins, etc.
Another factor is WHERE to store your ribbon. Do you have tons of wall or shelf space? Do you have a closet with an unused rod or the back of a door available? Do you have enough ribbon to decorate every costume in a Broadway production? Do you like to purchase ribbon by the spool, or by the yard, or both ways? Take a look at the following suggestions as you consider your likes and options:
- Wall Shelf with Dowel(s)
- Ribbon Spool Organizers
- Loose in Jars
- Ribbon Rings (You can make your own!)
- Wrapped on Cards
- Stacked Spools, DIY
- Stacked Spools, Ready-Made
- Ribbon Storage Bag (Great for Crops!)
- Storage Studios Boxes in a Drawer
- Totally Tiffany/ScrapRack System
- Ribbon Spoolers
- Ribbon Boxes (You can make your own!)
- Page Protectors in 3-Ring Album (Preferably the kind used for slides or baseball cards, only putting one ribbon strand in per pocket.)
- Floss Cards in Floss Boxes
- Pants Hangers
- Spools Stacked on Dowels (Place them inside jars.)
- Plastic Sandwich Bags (Place in boxes or hang them on a corkboard.)
- Spool on a Tension Rod (You can put this in any open space between furniture, on shelves of an backless unit, or even in a window or door frame!)
Stacy's solutions evolved over the years. She started with ribbon in the Cropper Hopper embellishment boxes. The problem was, if her ribbon was over 3/8” wide, it wouldn’t fit. She stored her wider ribbon on ribbon cards in a large ArtBin box. However, the ArtBin boxes took up a lot of space.
Then she tried ribbon spools placed on dowels on a pegboard. She eventually took everything off and used the pegboard for tape rolls.
Later, she got tired of looking in three places for a piece of ribbon. Her solution was to combine everything into a one card system, using clear plastic shoeboxes to hold the cards. One color per box made it easy to find what she was looking for.
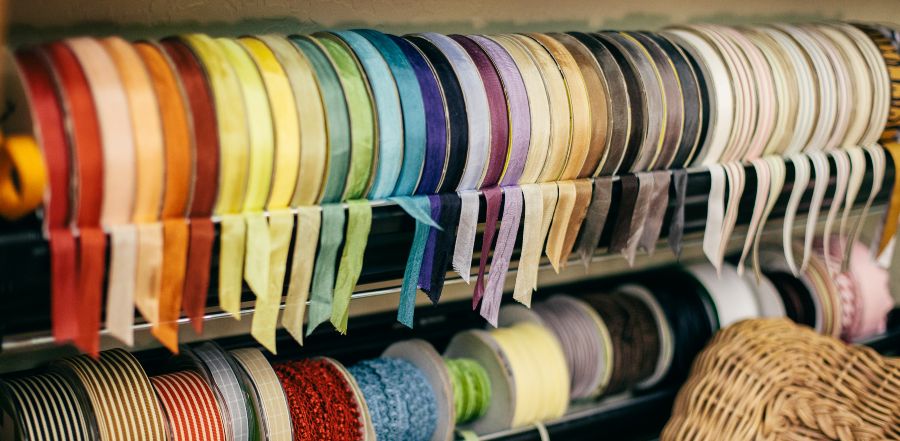
Some of the cards are from a company, and the others she made herself from chipboard she had saved. Each ribbon end is secured to the card with a glass head straight pin. For fibers and floss, she uses the floss cards in floss boxes, divided up into multiple colors per box. Her felt "ribbon” that comes on rolls (or that can be made into rolls) is stored on dowels.
She keeps all her colored twine in rolls in a wire mesh basket. Her scrapping floss is in another basket and her mesh in another.
If she forgets to put one of her baskets away, no big deal! They look pretty sitting on the countertop as décor.
More Insight on Organization
Ribbon and twine happen to be a favorite supply of mine and, like Stacy, I too have tried numerous storage and organizational options and containers (many were the same things Stacy did before she decided on her current system). I’m sure many of you have been in the same boat--and there are beginners reading this information that are developing their very first system. Hopefully, our trials and errors will save you precious time and money, or maybe, you’ll learn from trying several options like we did. The organization I used was time-consuming and expensive to implement in the beginning, but it’s easy to maintain now and is worth it.
Because ribbon is a staple in my world, I love to have it on hand when I create. One of my pet peeves is not having what I need when I need it--you know the frustration, I’m sure. I either have to wait until my next shopping trip, or have to make a not-so-quick trip to the store. So, when I see ribbon I like and know I will use, I buy a couple of yards and bring it home and process it into my system. With the convenience of online shopping, it's easy to find the perfect ribbons and fiber for my projects-in-process, as well as projects to come.
Jill's Ribbon System
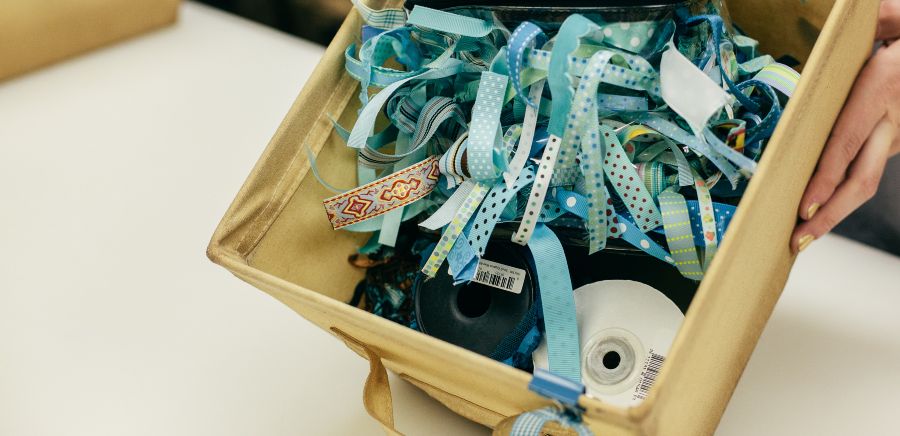
I use Pull EZ ribbon storage bags for all ribbon not on spools. It took me a few months to purge and sort my ribbon into color groups, turning into an enormous yet oh-so-gratifying undertaking. For the next step, I enlisted the help of a friend. We wound each piece of ribbon (so I could get more ribbon into each bag) and stuck the end out of one of the holes in the bag. Once full of ribbon, the bags looked like lifeforms from a Sci-Fi movie. This was somewhat problematic since I needed to have these bags fit in with the vintage vibe going on in my studio.
Easy fix? Yes. I stuck them in labeled canvas totes and they sit on a shelf above or below their sister-color embellishment tote. There is even room for some spools of ribbon around the sides of my ribbon bins if needed. You may be asking, "What about scraps that aren’t long enough to go into the bag but long enough to save?" There is a pocket on the inside of the bag lid and that’s the place I look first when searching for a scrap.
I do have some ribbon on rolls that work well as displays with my décor. I wanted them in a system where I could see them, and make quick choices about how they could be used in projects, so I opted to store most of them in wall-mounted organizers built specifically to clip up ribbons.
Some scrappers store their ribbon in re-purposed thick plastic bags that once held scrapbooking kits. They use a We R Memory Keepers punching tool to punch holes through both sides of the bag, putting an inch distance between each hole. Then they string ribbon through the holes and pull one end of each piece of ribbon out of one hole. The bags are hung on wall hooks so they can easily take bags off to retrieve their ribbon.
Organizing Fiber
It took some time to get all of my fiber wound onto cards and into labeled floss organizers (like Stacy does), but now it’s quick and easy to get newly purchased fiber wound and into my system. Fibers, like my ribbon, are stored ROY G. BIV. Each container is stored right under the same colored hardware bin in my embellishment center.
Organizing Twine
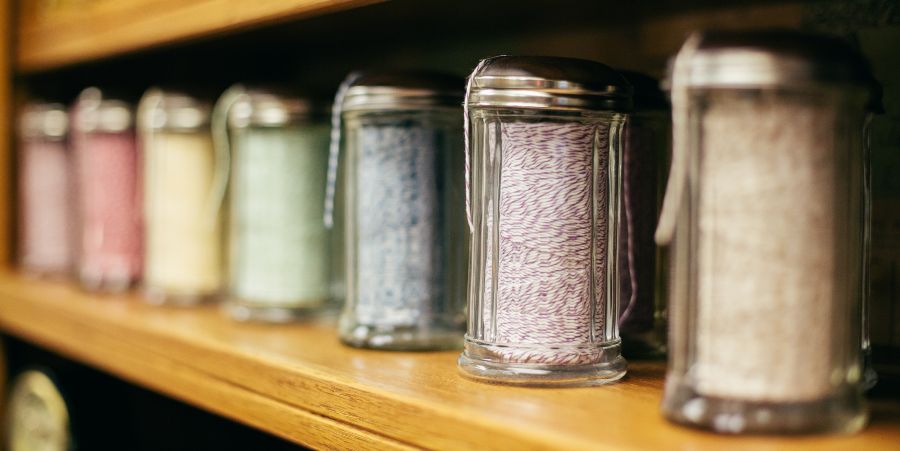
Another personal favorite material of mine is baker’s twine. I found the storage container idea I use on Pinterest. I purchased a case of lidded sugar dispenser jars from an online restaurant supply company and put one spool of twine inside each jar; placing the twine end laced out of the spout in the lid. Twine is constantly accessible and I don’t have to dig or get in and out of containers to use it. A sharp pair of scissors (only used for fabric and fiber) is in a pencil cup on my desk close by. I wanted these jars to be part of my décor so they are in ROY G. BIV order. The shelf is deep, so there are other shades of the same colors behind this display.
Organizing Decorative Tapes (Washi Tape)
I consider washi tape and other decorative tapes to be a lot like ribbon, so I organize them together. I had all tape rolls in their respective color embellishment canvas bins at first. However, I found I rarely went digging for them. I transplanted them into a clear storage bin/case and now I only have to look in one shallow container. If you want your washi tapes to be out on your workspace, consider using a dispenser made specifically for washi tape.
Organizing Sewing Supplies
My sewing center functions from one end of my island, while the other end harbors supplies in bins and drawers. My little sewing machine is accessible at all times on my island. I enjoy not having to lug it out and set it up when I want to stitch on a layout or card. My iron, attachments, bobbins, and thread are in a drawer nearby, and a mini ironing board is tucked beside the desk, out-of-sight. I have a travel organizer that I unfold and hang from an upper cabinet handle to use when sewing for extended periods of time. This organizer houses compartments that hold needles, pins, thimbles, a tape measure, extra bobbins, a seam ripper, etc. It is stored permanently around the corner from my desk.
A small collection of fat quarters (quarter-yard cuts of fabric cut wider) is in drawers under my button center that can be easily accessed when I want to add fabric to a layout or card. My regular-sized sewing machine (for fabric-only) is in my laundry room where there’s access to a large ironing board and a sewing table nearby. It’s easy to grab my sewing tool organizer from my studio when I need to use my sewing machine in the laundry room.
For more creative ideas on how to organize your sewing supplies, read Decorating Files' article called Organizing Sewing Supplies: 20 Super Simple Ideas. Here, Peggy Pardo, an interior decorator, professional organizer, and author shares amazingly easy tips on how to best organize ALL of your sewing materials.
Ending Thoughts on Ribbon Organization
Storage solutions for ribbon and fiber are abundant and each is a possibility for a more stress-free scrapping experience. When your system and supplies are set up and functioning you’re more productive, and your space looks amazing.
Your ribbon, fiber, and sewing supplies should be in a much better place once you find the best solution for your organizational needs. Get your plan in place, sort, purge, and organize--you know the drill. Keep reminding yourself that your space is changing in a good way, your efforts ARE making a difference, and it won’t be long before your space will feel as good as it looks.
If you liked this article, then you may also like...
How to Organize Embellishments
How to Organize Alphas and Numbers
How to Organize Stickers and Rub-Ons
Our free organizational class called Get Organized lended inspiration to the formation of this article. Sign up for Get Organized today and take on all of your craft room organizational fears, learning invaluable tips and tricks along the way!


