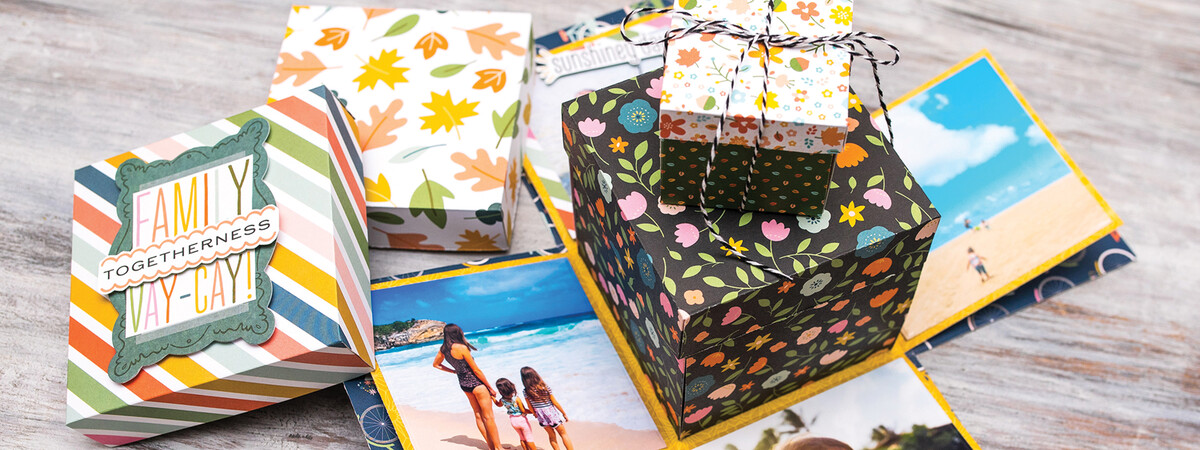
Hello everyone! It’s Channin here and I’m so excited to share with you a couple of exploding box projects!
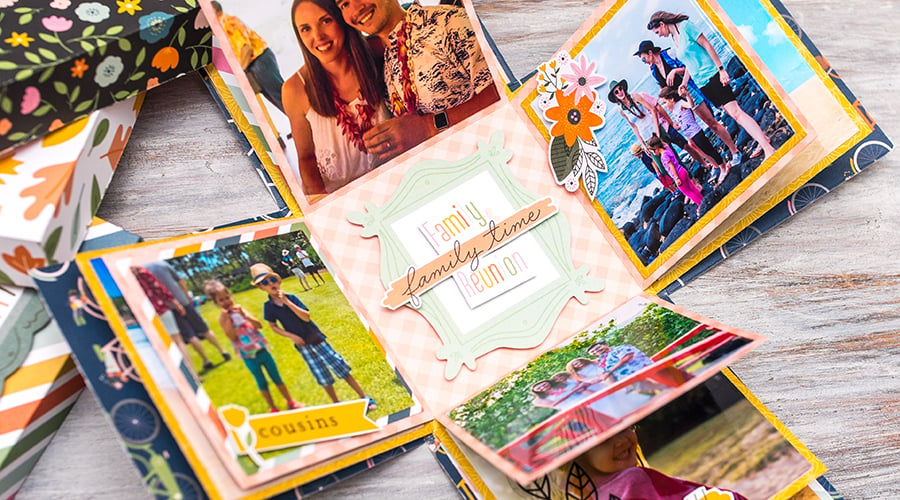
What is an exploding or explosion box? It's a fun and versatile concept that combines scrapbooking, memory keeping, journaling, card making, stamping, and gift-giving. Using cardstock, adhesive, and a little creativity, you can create a paper box that reveals layers of fun photos and accents when you remove the lid.
 Today I’ll create two exploding box projects: one demonstrating how to use the exploding box for scrapbooking/memory keeping and the other showing how to create a fun card or treat box.
The possibilities of exploding boxes are truly endless! See the exploding box measurement chart below that can help you create 13 different sizes of exploding boxes.
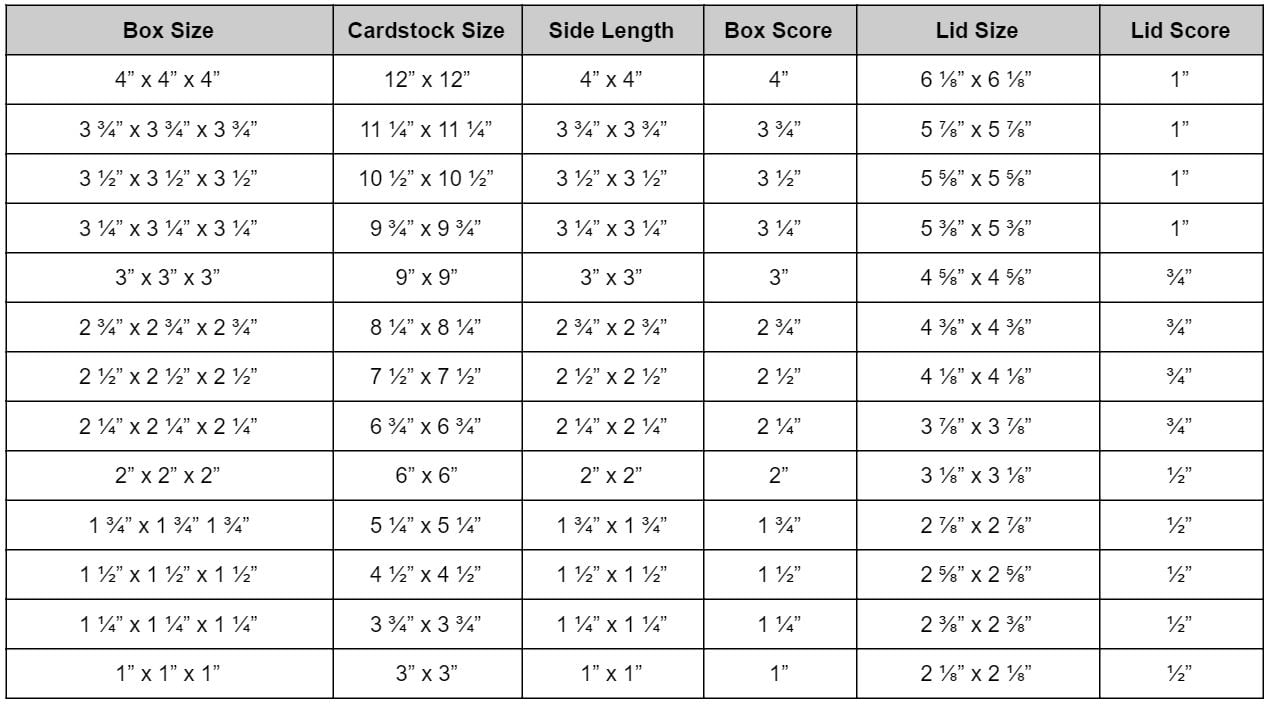 Make sure you keep this helpful exploding box measurement chart handy for all the dimensions you need to know for creating exploding boxes in a variety of sizes!
Let's get this exploding party started!
How to Make an Exploding Box
The exploding box design is perfect for scrapbooking or journaling. You can add as many or as few layers as you like. You can also choose to embellish just the inside of the box, just the outside, or both to really fill your box with lots of photos and accents.
And the best part is, you really only need some basic supplies to achieve a true WOW effect. So grab some paper, double-sided adhesive, a cutting tool, and a scoreboard with a scoring tool. The embellishing and decorating can be done with ephemera, stickers, die cuts, photographs, and whatever else you can think of!
Step 1. Make the Box Side Panels
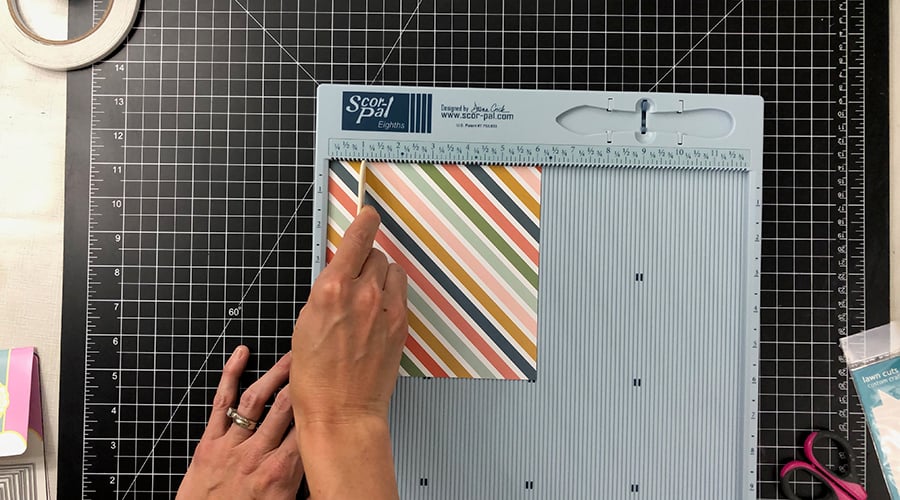
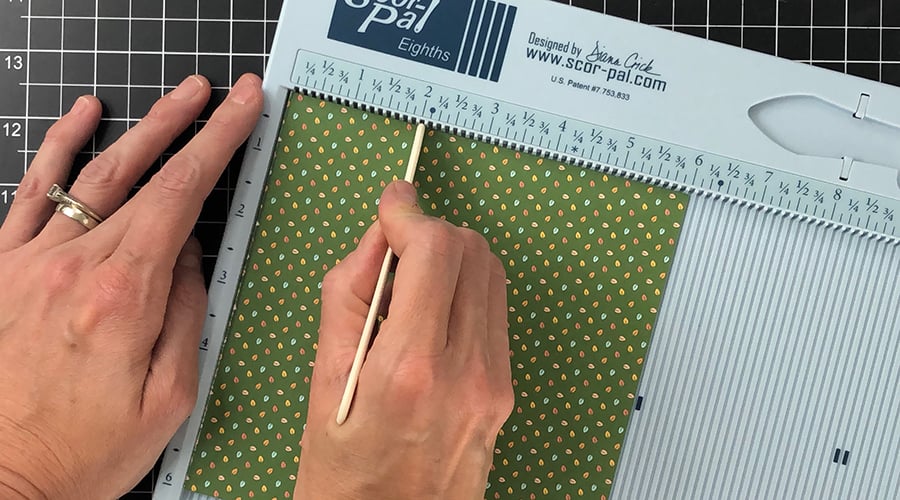
First, select your box size. If necessary, trim your cardstock down according to the dimensions listed in the chart. I chose box #1 which makes the largest box (4” x 4” x 4”) and requires a 12” x 12” sheet of cardstock, therefore I did not need to trim my 12” x 12” sheet of paper.
Next, score your cardstock on all four sides according to measurements found in the chart. So for box #1, I scored at 4” on all the sides of my 12” x 12” sheet.
Scoring Tip: If you are using a patterned paper with different designs on both sides, make sure that the pattern you want facing outward on your box is facing up. This will ensure your score lines are in the right direction.
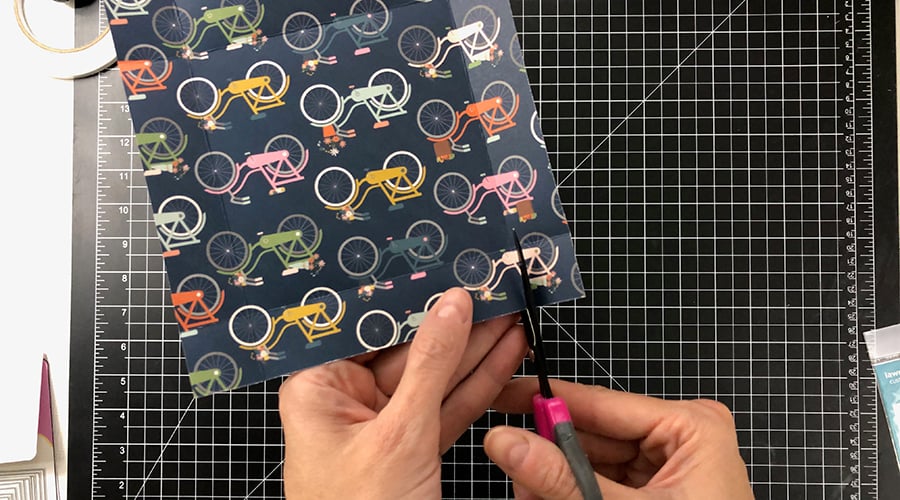
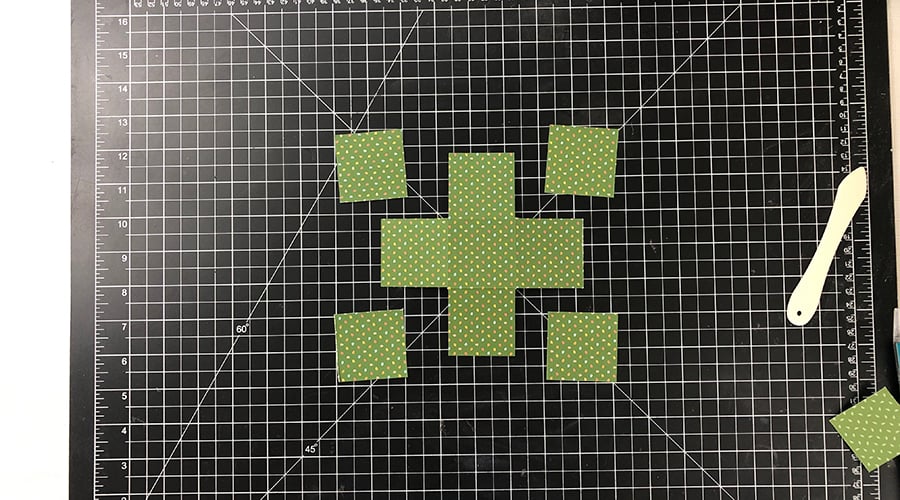
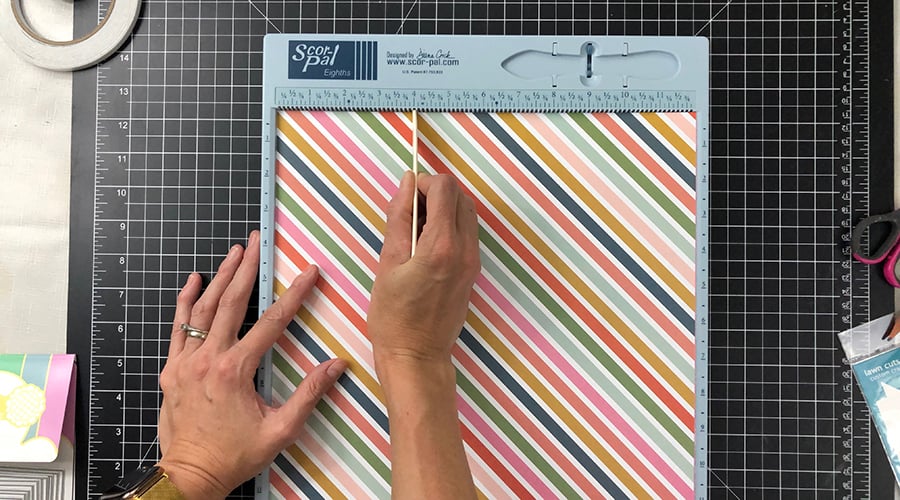 Once your sheet is scored, cut along the score lines with either scissors, a craft knife, or a paper trimmer until you have removed all four corners. You'll end up with a piece of paper that looks like a big plus sign!
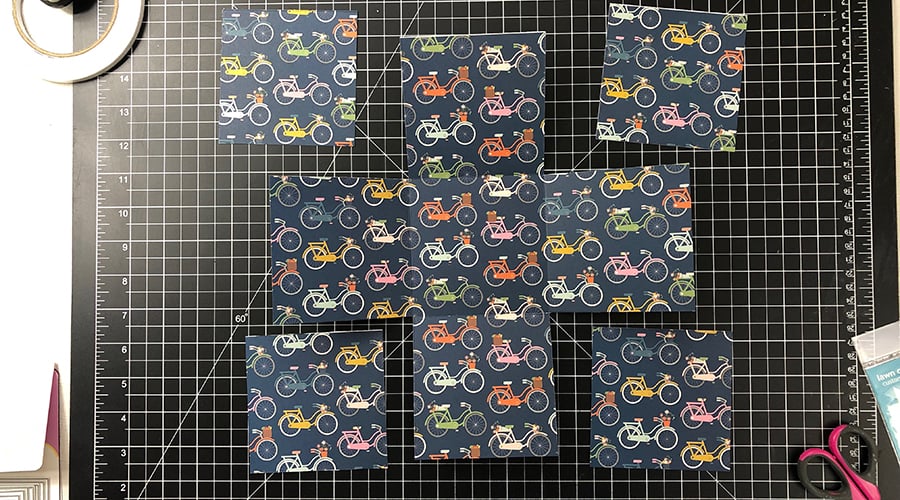 Save the scraps you cut off and use them later to either mat your photos or for other embellishments for your box.
Step 2. Make the Lid
Cut your cardstock down to the dimensions listed in the chart for your box's corresponding lid. For box #1, I trimmed my cardstock down to 6 1/8” x 6 1/8”.
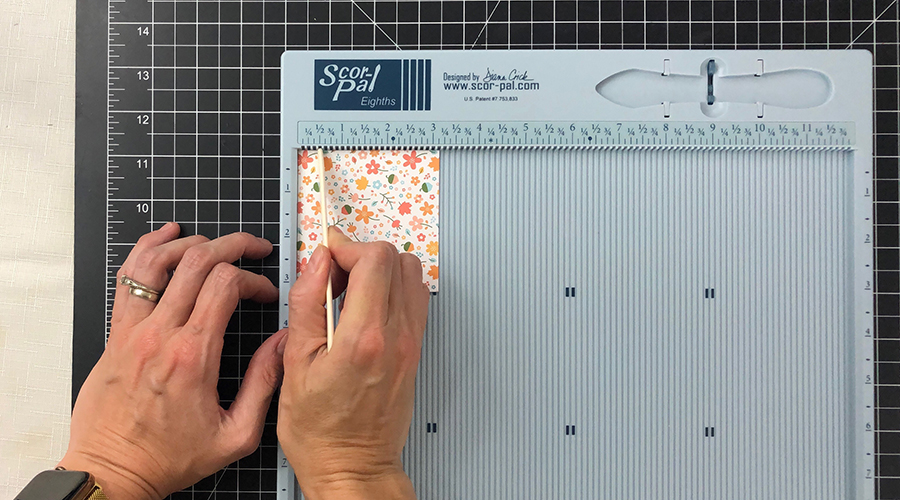
Next, score your lid on all four sides according to the measurement found in the chart. For my lid I scored at 1”.
Scoring Tip: If you are using a patterned paper with different designs on both sides, make sure that the pattern you want facing outward on your lid is facing up. This will ensure your score lines are in the right direction.
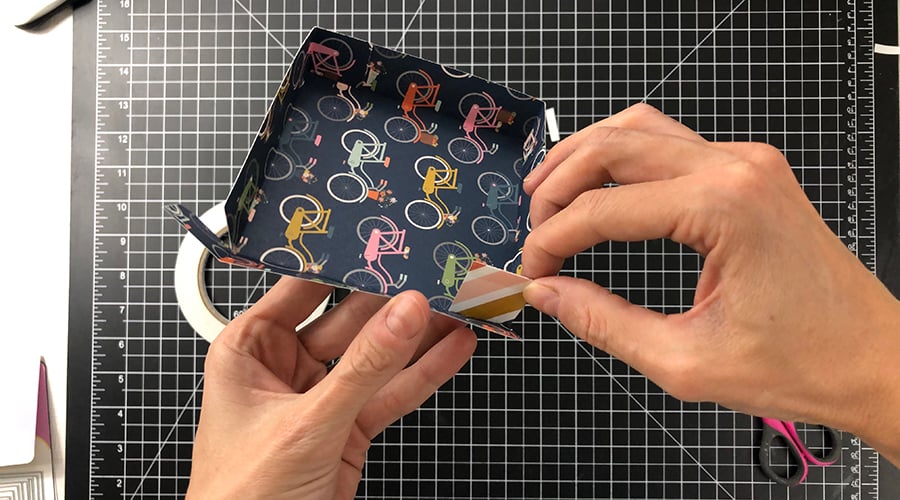
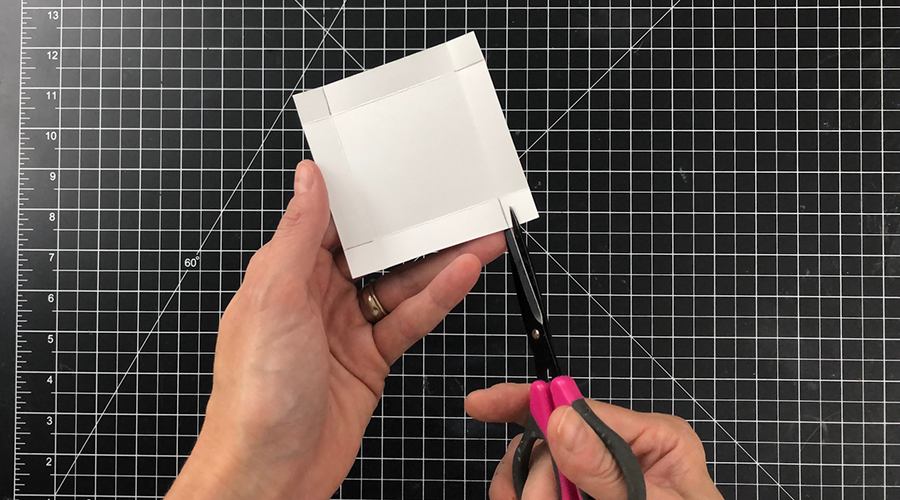
 Once you have finished scoring all the sides, flip your lid piece over so the inside pattern is facing up. You should see two score lines on every side of your lid, one on left and one on the right. Make a small cut on the right score line until you reach the next score line. Rotate your piece of paper clockwise and repeat this process until you've made four small cuts.
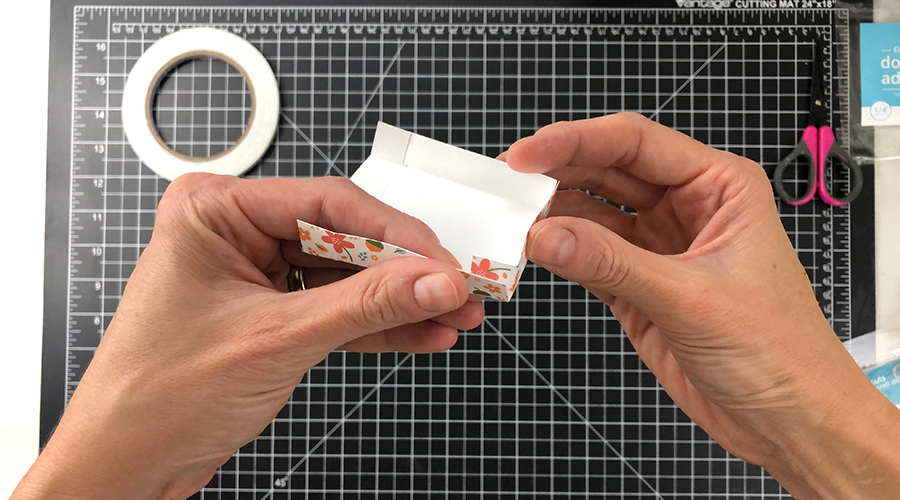
 Flip your piece of paper over again so the outside is facing up. Add a small piece of double sided adhesive to the top right corner. Rotate clockwise and repeat until you have double sided adhesive in all four corners.
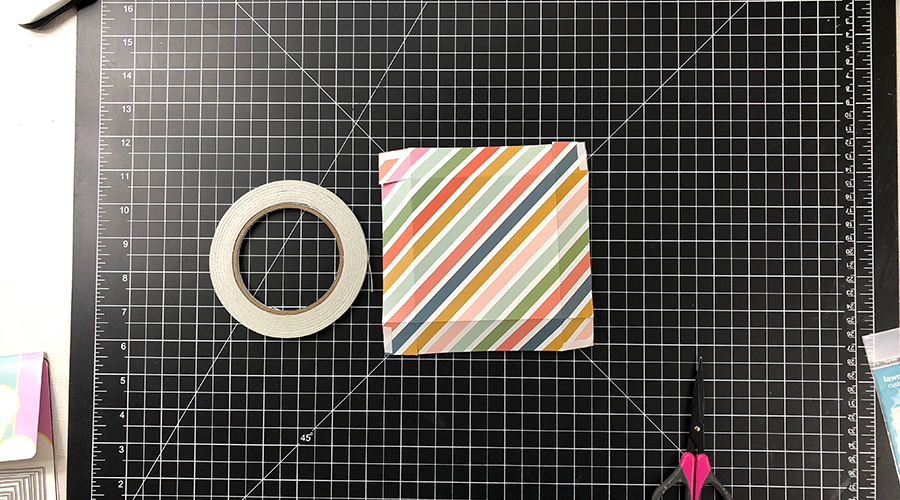 Remove the backing on the adhesive and fold the tab inside to form a corner, adhering to the piece next to it. Repeat this process on all four corners until you have your lid!
Step 3. Add Additional Layers and Embellishments
The joy of the exploding box is that they explode with smaller boxes inside! Now it's time to construct additional smaller boxes for your exploding box by repeating the previous steps.
Pick a box size smaller than your outside box, and cut the paper to size. Score, cut, fold, and adhere accordingly.
 You can choose to make corresponding lids for these additional inside boxes but it is not necessary to do so. You can either have the main lid explode all your layers at one time when it's removed, or you can remove each inside lid individually to explode the layers one box at a time. The choice is yours!
I decided to create individual lids for all the smaller boxes in this particular project.
Once you have created all your additional boxes, it's time to adhere them all together. Start with the largest box, then adhere down each base of your smaller boxes in descending size order so that the smallest one is on top. You can use a tape runner or liquid adhesive.
Tip: Make sure you only adhere the base of each box and not the sides. If you glue the sides together, your box will only explode in one layer!
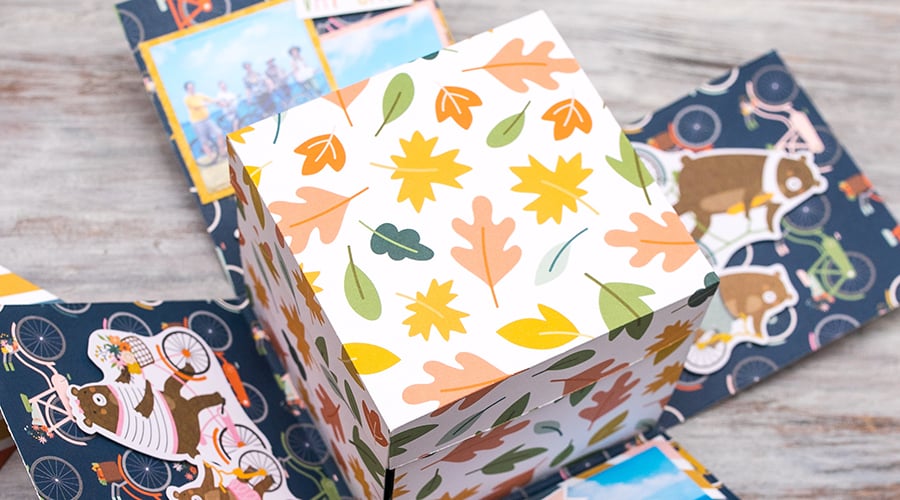 Now it's time for the fun part - decorating! The embellishments and contents of your exploding box are entirely up to you.
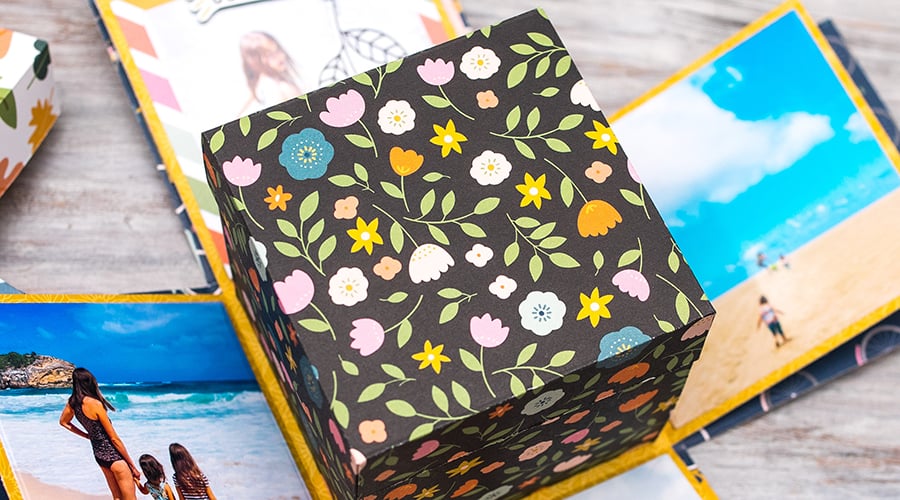 You can use fun ephemera and accents from your favorite paper collection, family photos, beautiful die cut words, stickers, keepsakes, and so much more!
Also, since all the sides of your boxes are perfectly square, you can use square nested dies for cutting photos down to size or creating fun patterned frames.
 The possibilities for each exploding box project, and every layer inside are endless! This is going to be your new favorite way to scrapbook memories, remember special moments, and give handmade gifts!
For a helpful video tutorial on this box, watch right here:
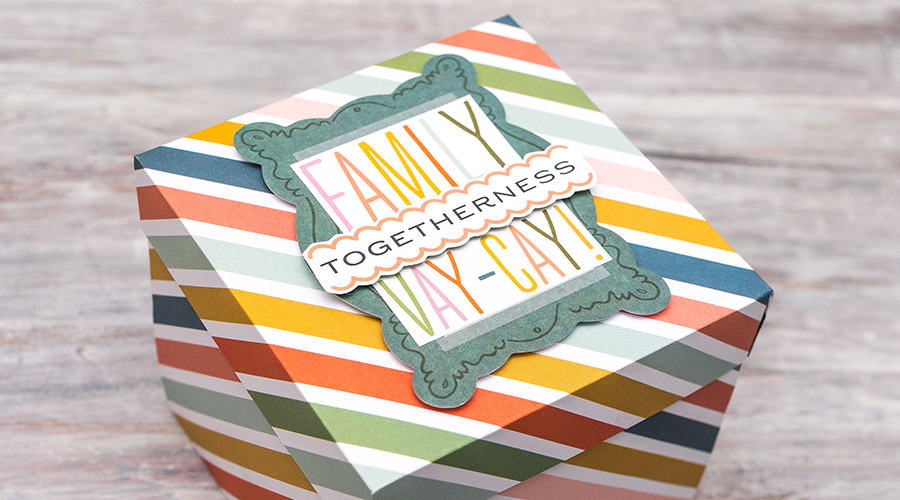
How to Make an Exploding Box Card
Another option is to create a card from the exploding box design. Because they are 3-dimensional, the exploding box design is great for gift-giving and momentous occasions like graduations, weddings, baby showers and more.
This is also a fun idea for small coworker gifts, party favors, or something special for friends at a crafty retreat or get-together!
Step 1. Make the Box
Start with a 6” x 6” sheet of cardstock and score your sheet on all four sides at 2”.
 Once your sheet is scored, cut along the score lines, with either scissors, a craft knife, or a paper trimmer until you have removed all four corners. You'll end up with a piece of paper that looks like a plus sign!
Step 2. Make the Lid
Cut a piece of cardstock down to 3 1/8” x 3 1/8” to create the lid. Score your lid on all four sides at 1/2”.
Scoring Tip: If you are using a patterned paper with different designs on both sides, make sure that the pattern you want facing outward on your lid is facing up. This will ensure your score lines are in the right direction.
 Once you have finished scoring all the sides, flip your lid piece over so the inside pattern is facing up. You should see two score lines on every side of your lid, one on left and one on the right. Make a small cut on the right score line until you reach the next score line. Rotate your piece of paper clockwise and repeat this process until you've made four small cuts.
Scoring Tip: If you are using a patterned paper with different designs on both sides, make sure that the pattern you want facing outward on your lid is facing up. This will ensure your score lines are in the right direction.
Flip your piece of paper over again so the outside is facing up. Add a small piece of double sided adhesive to the top right corner. Rotate clockwise and repeat until you have double sided adhesive in all four corners.
 Remove the backing on the adhesive and fold the tab inside to form a corner, adhering to the piece next to it. Repeat this process on all four corners until you have your lid!
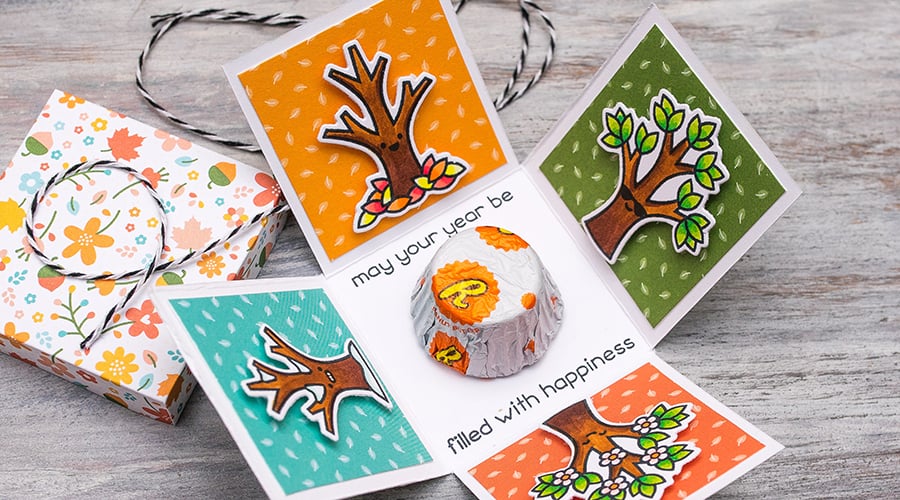
Step 3. Decorate
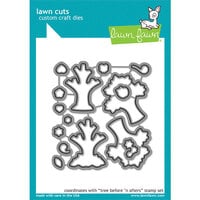
It's time to get creative! Stamp, die cut, color, or adhere images on the inside of your exploding box card! I chose a fun Lawn Fawn set to stamp, die cut, and color.
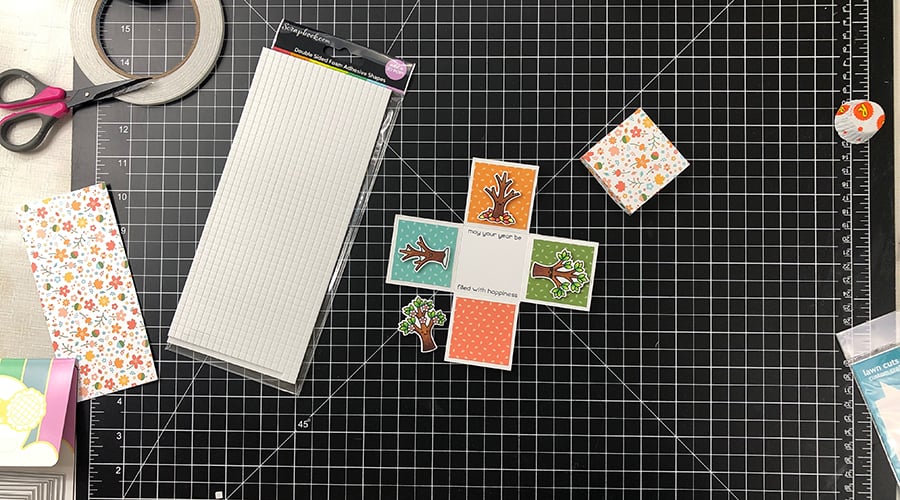 For this small box, I cut four 1 3/4” squares of cardstock and adhered them to the inside panels of the box. Using foam squares, I popped up the die cut Lawn Fawn trees on each panel and stamped a fun sentiment on the bottom of the box.
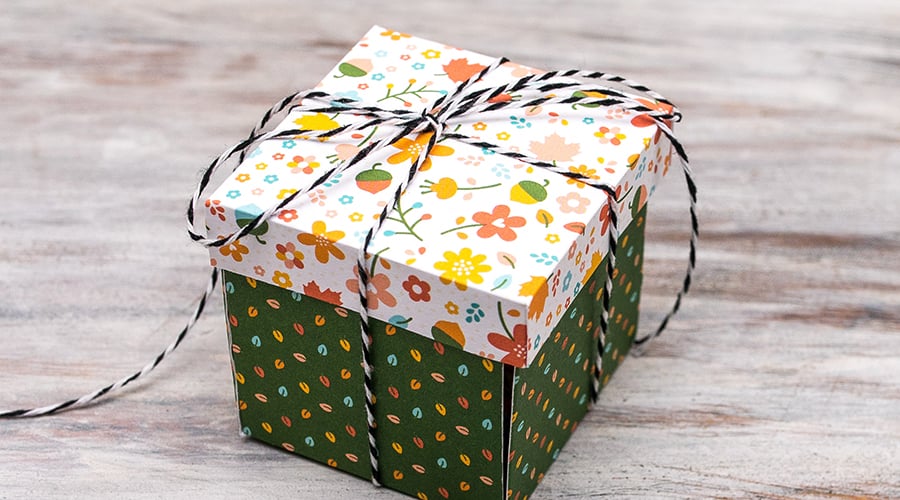 To make this extra special, I added a tiny treat to the inside of the box with a glue dot. Then I folded up the panels, placed the lid on top, and secured my exploding box card with a little piece of baker's twine.
 Check out Channin's video tutorial on this little exploding treat box right here:
I hope you've enjoyed learning all about these two exploding box techniques. I know you're going to have so much fun creating unique designs for friends, family, and yourself. Be sure to share your creative creations in the Scrapbook.com gallery to inspire others!
Are you looking for more fun projects and inspiration? Then you won't want to miss our Guide to Making Interactive Cards or our Ultimate Guide to Crafting with Foil.