This article was written by Scrapbook.com founder and organizational master Jill Davis. With permission, Jill brings to you special insight from fellow organizational expert Stacy Boatman.
Materials Needed When Organizing Your Dies and Die Cutting Equipment
- Sturdy or heavy-duty containers or racks that can hold and store bulky metal-ruled dies
- Small, medium, and large containers for wafer-style die storage
- An inventory system (if desired) for your dies
- A label maker to label containers (and dies)
The Challenge of Organizing Your Dies and Die Cutting Equipment
When organizing your dies and die cutting equipment, you'll be faced with the challenge of finding the right organizational system that works for you and implementing that system into your studio. Once your system is in place, you'll be able to keep an updated inventory of what dies and die cutting equipment you have.
The Process of Organizing Your Dies and Die Cutting Equipment
There are three ways to organize dies:
- By manufacturer
- By type (which you can then organize by theme)
- By size
TIP: In theory, it would be nice to always organize by type, or to have all your shapes together by themes, however, it might be a nightmare to find a storage solution if you have a large collection. With all the different die manufacturers and the many accessories, it can be mind boggling!
Die Organization Options
You can store dies by manufacturer and create an inventory notebook or Rolodex file where you group your dies together by theme and with sample images of what you own. You can then turn a page in your notebook or flip the cards in your Rolodex and see all your “dog” dies, for example, from all manufacturers, and then go to the appropriate manufacturer bin or location and take the die you want. You can also organize and store your dies by size and then alphabetically using an inventory notebook or Rolodex file to keep track of what you have.
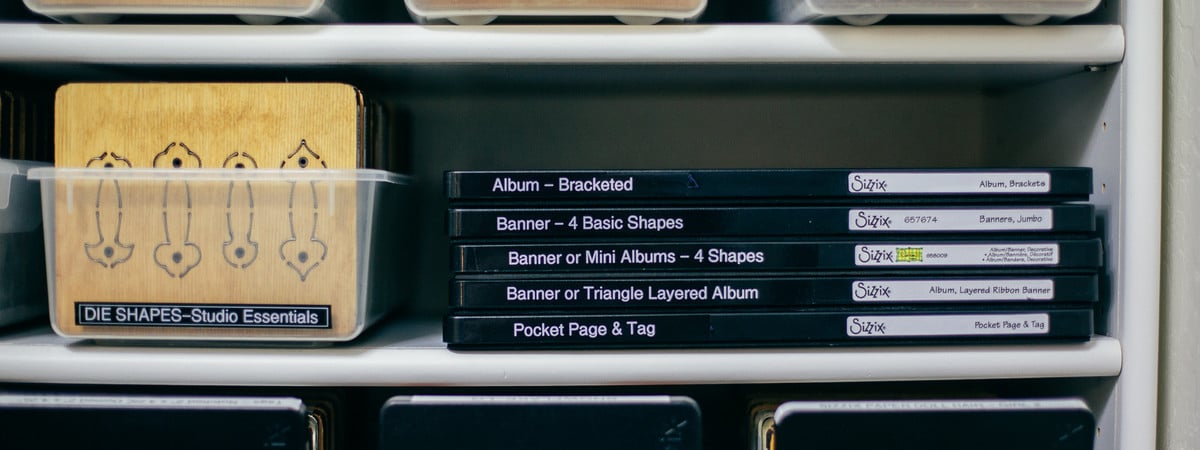
General Die and Cartridge Organization and Storage
First, we’ll address storage options for many different types of dies. Second, we’ll tackle specific systems and solutions for the different dies within these systems. If a die system is missed, it’s because solutions couldn’t be found. If you have found a solution that works for YOUR dies, be sure to post your images into the Scrapbook.com Gallery for the benefit of everyone!
General storage ideas for any and all die systems:
Here are a few ideas for how to store your dies:
- Photo storage boxes
- Clear plastic shoeboxes
- Divided hardware storage drawer units
- Divided plastic boxes
- Over-the-door tape storage racks
- Ribbon holders
- Narrow drawer units
- Bins or boxes
- Sizzix towers - no longer being produced, but you can find them on Ebay
- Plastic shoe boxes
Stacy keeps all her Sizzix dies in photo storage boxes, nothing fancy. Her border dies (the long ones) are kept in plastic ruler cases you can purchase from any office supply store. The Sizzlits dies are kept in baseball card holders in 3-ring binders. She gets two alphabet sets per binder. Many pocket page protectors would work very similarly to a baseball card holder.
- On magnetic sheets
- ArtBin Magnetic Die Storage Case
- Metal tins
- Die carry case
- Clear CD cases
Wafer Thin Metal Die Storage Solutions
Being a HUGE fan of wafer thin metal dies, it took me some time to develop the right wafer thin metal die storage system that worked best for my needs. There are many options out there for you to try; and really, there isn't any ONE solution. Sometimes, bringing multiple storage options together is what makes a complete and compatible storage system.
Magnetic Metal Die Storage Sheets
Many crafters will tell you that magnetic metal sheets are the way to go when storing your wafer thin metal dies. Being magnetic, your dies will stick to them like glue, and losing the sheets would be a lot harder to do than losing single dies. Most magnetic metal die storage sheets are stored in a box/container made for them. Also, refill metal sheets can generally be easily purchased. Organizing the sheets by alphabetical order or by subject would be a step closer to total wafer thin metal die storage nirvana.
Thinking Outside the Wafer Thin Metal Die Storage Box
If you find that you'd prefer to display your dies, magnetic strips inside of a chic frame or even magnetic knife racks work great! Pocket page inserts in labeled binders can be a solution for you if stored upright, as there are no magnetic sheets holding the dies in place inside the pockets. Other options include labeled envelopes, a Rolodex-like system, an old CD storage system, and specially made zip-up binders with magnetic inserts.
Check out these GREAT die storage options:
- Art Bin - Translucent Magnetic Die Storage Case
- Tonic Studios - Large Ringbinder Die Case
- Tonic Studios - Medium Ringbinder Die Case
- Best Craft Organizer - Wall Box Storage System - Stamp 'n Die Storage
- Sizzix - Plastic Envelopes
- Totally Tiffany - Die-Namic Die Storage Set
For continued wafer-thin metal die storage reading, check out How To Store Your Wafer-Thin Cutting Dies by Judy Nolan.
Further Insight on Die and Die Cutting Equipment Organization
I have a Sizzix Big Shot that I use to cut all of my non-electronic die cut images. I appreciate its functionality, adaptability and the thought that has gone into its construction. I have many dies from many brands, and most in my collection can be used with the Big Shot and adapters. I also have an electronic die cutter by my computer. I rarely lack options for die cut shapes, and if I do, I call friends to see if they have a solution. I store all metal-ruled dies in plastic shoe boxes alphabetically on shelves in my closet. Larger dies are on shelves too. I add a new label to each die so I’m sure one is on the side of the die that faces up in the shoe box. I keep all of my Tim Holtz dies in the same containers because of the size difference, and because they are distressed-looking which is what I look for first. Embossing folders are in these same bins labeled with a black Sharpie marker, and in alphabetical order. I also keep my wafer dies in a binder in plastic sleeves by set or alphabetically.
A double-wide Rolodex is on the counter in my closet. It has an image (one per card) of every die I own. This system took nearly a year to set up, however, it has been completely worth it since my dies were organized in a semi-functional way before. I also needed a way to include electronic images in my system so I would use them.
I went to the die manufacturer websites, found images, copied them, and placed them in a Word document. I sized each image to fit onto a Rolodex card and printed them in grayscale to save my colored inks. Each image was then cut out, glued onto a card, and a theme was noted along with the location where the die is stored. These cards are organized alphabetically in themes. For example, if I need a star image I quickly look in my Rolodex under the “S” tab and then look for “Star” labeled cards. I will find Rolodex cards with electronic images, metal-ruled die images, wafer images, and embossing folder images of stars. The location is noted on the card to tell me where the die is located in my closet. Many electronic cards come in themes. This makes it easy to copy the complete sample sheet that comes with the card and file it (folded) in the Rolodex under the theme.
If the electronic card has generic shapes on it I write a note on a Rolodex card (instead of adding individual pictures of the images onto cards) as a reminder that I can look in other themes to find an image I need.

Going through this organizational process has made me very aware of my purchases and given me a keen sense of what I do and don't need. It takes precious time to get a die processed into my system, so I think twice (or maybe even twenty times) before making a new purchase. A shape has to be really good (according to my tastes and style, of course) to get a place in my studio.


Tip: Some scrappers like to make an Excel spreadsheet that shows them at-a-glance what dies they have. This is perfect if you want inventory sheets with image samples as part of your system.
Summary
When dies and their equipment are organized, labeled, and put into a functioning system, they are a pleasure to work with. You’ll be inclined to use them more often in your crafting process as they will be neatly organized and snug in ideal storage containers.
If you are looking to further enhance your craft space organizational skills or want to learn more about die cutting and die cutting storage, check out the following informative articles:
- How to Organize Paper and Chipboard Dies
- How to Sort and Store Your Scrapbook Paper Scraps
- 5 Days to an Organized Crafty Stash - Die-namics Storage
Want to share your ideal organizational system with others so you can help spread the organizational torch? Post your images into the Scrapbook.com Gallery, and don't forget to tag #LifeHandmade and #Scrapbookcom!
This article is part of our free class called Get Organized. Further expand your craft space organizational skills by signing up and taking the class for FREE here!