


This article was written by Scrapbook.com founder and organizational expert Jill Davis. It also uses some methods and concepts developed by organizational guru Stacy Boatman. With Stacy's permission and help, we've included her concepts and experiences in this guide as well. You can also take the full, free class with multiples lessons and detailed photos. And, if you need them, you can get craft storage products here at Scrapbook.com to help.
Materials Needed to Organize Your Photos
- Photo storage boxes
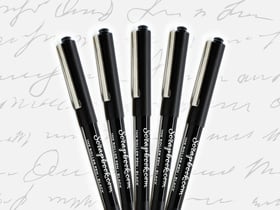
- Photo marking pen
- Label maker
The Photo Organization Challenge
Now is the time to dig in and deal with organizing one of the mainstays of scrapbooking: Photos, digital and print. You will be developing a system that will rescue your photos from cardboard boxes and organize them into albums or acid-free containers. First, you'll need to relax and let go of the "I have to get this done this week" thinking. Please don't feel rushed or get worked up about the process and time it takes to get photos organized. You WILL be able to decide on a system and be on your way to getting your photos in that system soon enough. This article will cover both digital and print photos simultaneously, because it's best if those systems match. It seems silly to have one method of organizing your print images, and then try to remember another system for pictures stored on the hard drive of your computer. If your systems mirror each other, you'll always know where to look, how to look, and how long it will take.
Photo Organization Methods
Let's start by looking at the possible systems or methods you can use to organize your photos. Good news! You only have two choices:
- Chronological
- By Subject (theme, family name, or locations)
That simplifies things, doesn't it? Whether you organize by subject or by year, it all depends on how you scrapbook. It's also possible to combine the two options. I think most of us think chronologically when it comes to storing photos. However, storing by event can make the process of finding a photo very easy too. For example, every mother knows the dates her children were born. People remember the dates of weddings, their own or family members. So, it makes sense to file photos by location. If you have a lot of heritage photos, or photos in which the dates they were taken don't really mean much to you, then organizing by subject or theme is the way to go.
Labeling Printed Photos
If you have a box of photos labeled "2003 - Family," then you should also have a folder under "Pictures" on your computer labeled "2003 - Family." For chronological organization, label with the year first, then the month. Or, you could sort and label by year, and seasons (i.e. Spring, Summer, Fall, Winter). Within each month or quarter, you could also break it down into more specific events if you tend to take a lot of event-based photos. For example, if you have photos from Easter Sunday in Spring of 1988, you would place them into your contained system under the file tab labeled "1988 - Spring, Easter." You would also have a folder on your computer with the same photos (digital) labeled the same way. You decide how you want to set up your labels and keep in mind that you will probably pass this system on to someone else interested in the photos someday. So, keep it simple and intuitive.
When you don't know the date of a photo, make a guess. This process doesn't have to be difficult, and the Photo Police aren't going to haul you off if you mess up. It might help to have folders for groups of several years of photos (Example: 1970-1975) if you don't know the exact dates. That date label will be close enough to find them when you need them. Additionally, you can label the backs of print photos "Circa 1970" (or whatever the year) which means "about 1970." The main goal of this photo challenge isn't to get your photos in exact locations by date or subject, but have them in locations where you'll know where to look for them when you need them!
I still handwrite, "who, when , where, or what" information to the backs of my printed photos whenever possible using a photo safe pen. Please NEVER us a ballpoint pen to write on the back of photos, because it will make permanent indentations. Fiber-based paper was used for photo printing in the 60s and 70s, so be careful when adding information to the backs of these photos.
If you need to get the same date onto the back of several photos, use an office date stamp and photo-safe ink. Please don't use Staz-on Ink on fiber based paper, because it can bleed through to the front of the photo.
Further Insight on Photo Labeling Benefits
I always label my photo backs, because of the following cycle I've noticed through my years of photo care:
When I started scrapbooking, I was a young teenager who scrapbooked for nobody but herself. The photos I used were mostly of me, friends, and some of my family. I also had photos of ancestors that my grandmother shared, which she labeled for me. I knew who the people in the photos were, and that was the beginning of deep family ties and connections. When I married, I acquired photos of my husband and his family. I then added them to my photo storage system. Most of those photos weren't labeled, so I met with my mother and father-in-law for several sessions to get dates, names, and locations. I made notes about the events and people in the photos.
I want the family to have an idea of their connections to the people they are related to. I don't want our precious photos thrown away. The next historian in our family can take over and keep our stories alive.
As children were born into our family and their photos became integral to my system, photo labeling has been helpful in finding images for their scrapbooks. Now, I'm blessed with grandchildren who love to look through scrapbooks and enjoy the stories they contain. I've paid the price to know who the people in our scrapbooks are because I've taken the time to label photos, but my children and grandchildren haven't yet. This is because I'm our family historian, and I try to make sure our photos will be in order when I'm gone. I want the family to have an idea of their connections to the people they are related to. I don't want our precious photos thrown away. The next historian in our family can take over and keep our stories alive.
When my husband's parents passed away, we inherited seventeen boxes of photos, floppy discs, and family history books. It took me nearly a year to sort through the mass, and many sorting sessions were downright discouraging. Why? Because I'd come across photos with no documentation and I'd have to check with other family members to find out who the people were, and the possible event. It was time consuming for me to make the calls, and time consuming for the people I'd call. I'd do my best to guess who the people in the photos were. However, after going through hundreds of buddy photos from WWII, I gave up! I scanned several and let the rest go. How cool would it have been to see a layout with those soldier photos, their names, and their significant connections to Dad recorded? Now that's real history! Also, that's what we do. We give photos and memories purpose and meaning so they don't get lost or chucked in a trash can someday.
Digital Photo Organization and Tagging
Digital organization takes up a lot less space! Stacy Boatman's best advice is to get some sort of tagging software. She uses Windows Live Photo Gallery for PC. Other programs with tagging options include Google Photos, iPhoto on the Mac, Adobe Bridge, and Adobe Photoshop Elements.
What is tagging? It's actually what it sounds like, a digital label or labels assigned to each of your photos. So, all photos of Meeshack the dog are going to have a "Meeshack" or "Dog" tag on them. You can tag a photo with any label(s) to help you narrow your search. Therefore, if you're trying to locate the photo of your son playing with the family pet and can't remember the date or even the year of the photo, you can do a search in the tagging system for your son's name or the pet's name and the search will pull up every image on your computer with those tags. In addition, some tagging systems for your son's name or the pet's name and the search will pull up every image on your computer with those tags. In addition, some programs, like Windows Live Photo Gallery, have a star rating system from zero stars to five stars. Some scrappers like to "judge" their photos using this system using only five stars or zero stars. If you have a much-loved photo you want to get printed, it gets five stars. If it's a photo that you like but will never get displayed or scrapped (but you don't want to delete it), it gets zero stars so you know those photos were never printed. If a person using the system wants to pull up all photos printed in Spring 2008, all they have to do is click on the "Spring 2008" tab, then sort one more time for photos with five stars.
The system is easy to use and only requires your time and attention to get it into place and functioning. If tagging all of the photos in your computer feels overwhelming, start implementing your system now by tagging the photos on the next camera card you download. Then, make the decision to work on the other photos as you can.
I know that organizing your print and digital collections is likely the most overwhelming task in this entire challenge, so begin with one step forward and then take baby steps. The secret is to KEEP GOING! Sort and organize in 15 minute chunks, which is not enough time to drive you batty, but enough time so that you can make a serious dent in your filing and tagging.
If you have thousands of photos and tagging seems overwhelming, start by putting your photos into a few simple categories (i.e. people, places, things, etc.). Start slowly working with one "Old" folder at a time, moving photos into these new categories. Once the "Old" folder is empty, delete it! Soon, you'll have all of your photos in this temporary system. Now, pick one of the simple categories and revisit each photo, tagging each with a newer, more descriptive category. You may find that you'll have a tag system in place and that you'll keep adding more tags as you encounter more events and people (children, in-laws, grandchildren, etc.). Some people find it easier to make up their tagging system as they go along, since they don't know all of the names of the tags they will have when they begin. You can do this! It is possible! And, the rewards of doing it are fantastic feelings of success and accomplishment AND organized photos!
Backing Up Your Digital Photos
This cannot be stressed enough! Use at least two different methods and two different locations. There are many options: External hard drives, thumb drives, CDs, DVDs, and online backup systems. Each quarter, Stacy and I back up all of our photos onto a CD. I subscribe to an online system called Mozy which continuously backs up everything on my computer. The advantage of the online system is that if there is a fire, your photos are safe and can be reprinted. Any back up method works to protect photos. Just choose an option that will work for you. Your computer WILL crash someday. It's not a matter of "if" but a matter of "when," so take steps now to protect your photos.
I never thought our family would experience a fire, but one broke out in the attic above my mother's room in her assisted living facility. Precious family photos were in albums on her shelves. Most had been scanned or copied by me or my brother, but many were destroyed because she was unwilling to let us put them in an online system.
It used to be impressive that we treated original photos with great care. It still is, but not like it used to be. We can now copy or scan our photos and reprint them if needed. We can even reprint them in our home. When I first started scrapbooking, I had original, one-of-a-kind photos that were irreplaceable. The only means of copying them was in black and white on a Xerox copy machine or going to a professional printer for expensive copying. If I needed a replacement, I could only hope I could find the negative to reprint. With the advent of the digital age, we can now scan heirloom photos and print copies from home printers. We can send them anywhere in the world from our computers. Our photo possibilities are endless. However, we also have more responsibility for staying on top of our digital storage system and regular printing of the photos we want to scrap or have accessible for the family to enjoy.
Tip: Set a regular date to download your photo card and print your images. It can be weekly, monthly, or quarterly. It will be whatever works for you. Put the date in your datebook or note it on your calendar. Treat it like any other important thing on your schedule (i.e. getting your teeth cleaned, giving your dog heart worm meds, getting a physical). If it's on your to-do list, then you'll get it done. Stacy works on her photos on the 1st of every month. She downloads her photo card and edits her photos on that day. Then, she uploads and orders photos from an online print service on the 2nd of the month. Since she does this regularly, she doesn't have a huge amount of photos when printing, which makes it easy to budget for.
Tip: Once you get your printed photos dated, file them! Put them in their applicable album, file drawer, or in an addressed envelope (if going to family or friends). The less time photos spend sitting on your desk or kitchen counter, the less chance they'll become clutter.
How to Sort and Store Printed Photos
1. Gather all of your photos into one place. Locate photos in boxes, albums, envelopes from from photo labs, those stuck in the tote you took to a crop six months ago, or those on the fridge door you don't really see anymore. Find every single photograph in your home (yes, those in the garage and attic too) and put them in one place, preferably using the table method mentioned next.
2. Find the biggest table you can. You're going to sort photos on this table by putting them into stacks chronologically, by subject, or by year. If you have a lot of photos (e.g. 20 years or more), begin by sorting photos into decades down into individual years. You should have a pile for each year or subject when finished. If you're organizing by subject, then skip to step 4, below.
3. Once your piles are sorted into years, move the stacks to the back edge of the table so the front edge is free todo more sorting. Grab a pile and sort into months or seasons. Check photo backs for dates. If one isn't there, that's okay; that problem is addressed above. However, if it really bugs you, see if you can find the original image on your computer and see if you dated it there. Photos in a computer usually have a date stamp, though if they were downloaded after the date you took them the download date will be what shows up. Now, here's where some serious sorting begins. Look at each photo or group of photos that relate and ask yourself if the event or photo will make it into a scrapbook. This may be a new concept to consider, but not all photos HAVE to be scrapbooked. Only truly amazing personality photos make it into our scrapbooks, with some everyday life occurrences, and events that made a difference. Take out all photos that won’t go into a scrapbook and put them back into the year stack. These photos will go into your “Cold Storage” photo boxes which can be stored on any shelf (preferably with other cold storage boxes) in your home. The rest will get sorted into photo albums to be scrapbooked later, or will go into your file drawers by subject where you’ll make connections.
4. Make category divider cards for your photo boxes and get your label maker ready to label photos in your albums. Label your dividers and start filling your containers with the applicable photos. Once your photos are into their storage containers label the outside of your containers or albums with dates and/or subjects. Store these in your studio or in a place nearby so you’ll have easy access when it's time to scrapbook.
Photo Storage Solutions
- Photo Storage Boxes: There are literally hundreds of types out there, including a selection on Scrapbook.com!
- Creative Memories Power Sort system
- Photo Organization Box
- Expandable photo organizers
- Index card files
- Photo albums
- Photos stacked in fabric, metal or woven bins
- 4-drawer wooden cube units
How to Transfer Slides Into Photos
I’ve had all of our slides transferred into photos. Oh my goodness! Slides make incredible photos if they have been stored safely. Colors haven’t faded so you get a high-quality photo of yesteryear printed out on acid-free paper with quality ink. Interestingly, it wasn’t until some of our photos were printed from slides that the scratches on them were even noticeable. No worries, I scanned those photos and fixed them in Photoshop. You can visit a photo lab or try some at-home scanning options on the market today, including the Epson Perfection V600 Color Photo, Image, Film, Negative & Document Scanner and the Wolverine F2D Mighty 20MP 7-in-1 Film To Digital Converter. Just be sure to clean your slides before scanning. Dust bunnies don't look pretty on a scanned image.
How to Organize Photo Negatives
My negatives are in envelopes, in boxes, in a fire-proof file cabinet that’s in a closet outside my studio. That’s about all I can say about our negatives, because I think that’s how they’re going to stay until I get motivated to purchase a scanner for them. Scanning them into my digital storage system will take time that I don’t have right now. Honestly, that’s probably not going to happen on my watch and that’s okay. I’d rather spend the time scrapbooking or having experiences with people who are still alive.
If you have neglected negatives in shoeboxes and you want to do something with them, there are two main objectives. First, they need to be in some sort of order in case there’s a fire or accident where every photo you’ve ever printed from a negative gets destroyed and you need to make replacements (let’s hope that never happens). Second, negatives need to be in a safe, storage system, away from light, heat, liquids, fingerprints and rodent droppings. Unless you plan on accessing these on a regular basis, the system or container doesn’t need to be as user-friendly as your embellishment storage will be. And if you never, ever use a film camera, the containment system may not need to be expandable; just accommodating for what you already have. You will have one other decision to make: whether to store negatives alone, or with your photos. Either way will work.

Taking the Extra Step with Your Photo Organization and Storage
For those who are ready for a real photo overhaul, both Stacy Boatman and I recommend reading Stacy Julian’s book entitled Photo Freedom. The following is how her system works for both of us now:
Let’s first look at the containers and systems needed:
- Photo storage albums where you can add/remove photos from sleeves – limited to 15
- 4 x 6 file drawers–to categorize photos further into “themes” or “person”
- Larger storage drawers for 8 x 10 photos
- Containers for smaller than 4 x 6 photos
- Photo boxes - for Cold Storage photos that are not wanted in your photo storage albums, or file drawers
- Containers, or files for memorabilia–objects other than photos saved from trips, school events, outings, etc.
- Boxes or albums for storing negatives
- A jar for a motivational system–contains sticks or reminders that help you use your systems
- Albums to hold scrapbooked layouts
Now let’s look at each container or system and how it works:
Photo Storage Albums
Let’s look closely at how these containers work in this system. Photo albums store photos that will be scrapbooked by years, divided into four quarters, or by season. If you have more pictures than the suggested 15 binders, then it may mean you need to start scrapping more. Every photo I intend to scrap goes into these binders. I opted for more photo albums because I haven’t scrapbooked all of the photos from milestone events (weddings, trips, birthdays, etc.), and I still want to keep the photos accessible for family to view. Stacy suggests that you number the bottom edge of the album spine with dates and major events within so used albums can be put back on the shelf easily.
I purchased 3-ring photo albums. The pages are acid-free, and I sprayed the spines with black paint to look fantastic with my décor. I don’t care that the rest of the albums are red or green. I also didn’t want to have to update the labels on my albums each time I re-shuffled and update the photos, so I labeled them alphabetically with metal rimmed tags. I have a master list in one of the albums and on my computer. I update my computer as needed, which then tells me the basic contents within each album. Stacy used three-up, three ring binders from Pioneer. They’re not necessarily the most beautiful for décor, but they’re real workhorses and they’re not as heavy as my larger albums. You will need to remove or re-shuffle pages when you clear out and update the album, so the three ring feature is imperative.

This is how the storage albums work for scrapbooking. Suppose I’m in the mood to scrap and I only have 30 minutes to do so. I pull out a storage album and a kit (either one I’ve purchased or one I’ve assembled with my supplies ahead of time). I flip through the album until I find the perfect photo and I get going. This approach speeds up the layout designing process.
4 x 6 Photos Filed in “Category” Drawers
These drawers are another important part of this system. Mine are metal card file drawers I found at Staples. The four drawers are labeled: “People We Love,” “Places We Love,” “Us,” and “Things We Love”.

Category drawers hold photos that depict the quirks, talents, unique qualities, etc. of family members (and friends) For example: Stacy’s oldest son can turn about anything into a hat. Those pictures go in the “hats” divider within his “personality” section. Other photos of him sucking his thumb are behind a “thumb” divider in his section. For future blackmail, she has a “tantrum” category which may, or may not, come in handy someday. The idea is to be selective with the photos you put into these drawers so you can make meaningful connections with photos for layouts. Remember, the contents will grow and diminish over time as you sort and scrapbook.
Storage for Larger Photos
Now, let’s look at what to do with photos larger than 4" x 6". I have used Memory Dock storage drawers for years and so has Stacy. They will hold photos and documents up to 8.5" x 11". I have one drawer for each family member, plus a drawer for friends, and one for ancestors. This system worked when my kids were single and still works now that they’re married. I simply changed the label to include spouses. The Memory Dock drawers have been discontinued, but you may be able to find something similar at a department store. If you find the drawers are hard to pull out of the units it’s because they’re designed to be dust-free. I don’t mind the hassle because I don't access these drawers every day.


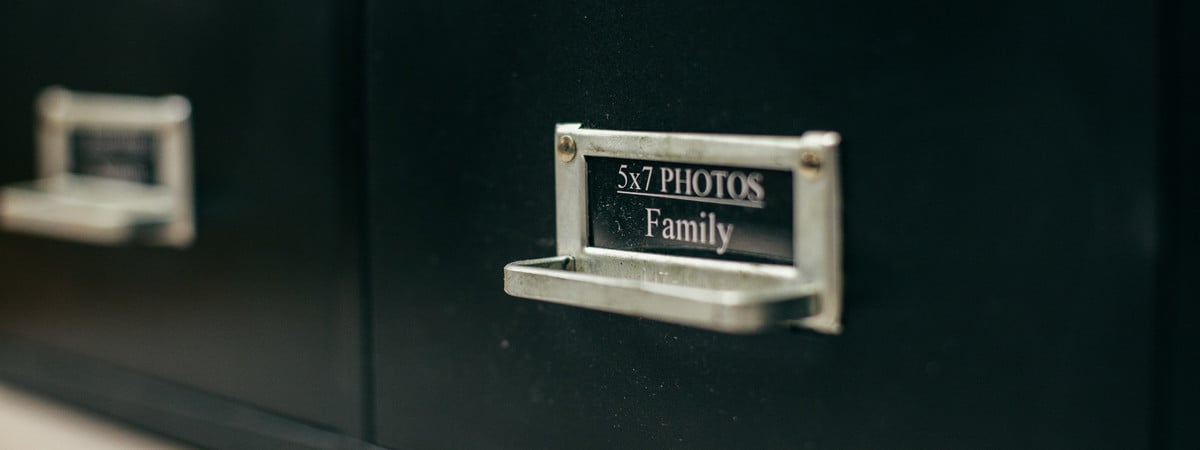
Additionally, I have a metal file drawer system that can hold 5” x 7” photos. Because my Memory Dock drawers were too small to handle all of my large photos once grandchildren entered the family, I opted for this additional storage piece in my system. The drawers have a divider for each family member.
An artist portfolio is ideal storage for family portraits no longer hanging on walls.

Storage for 2 x 2 Photos
Some scrappers own a 2-inch square punch that they use to punch images from photos that have unnecessary backgrounds. Additionally you can get a lot of photos this size onto a layout. While sorting, I punch these photos out. I keep mine in plastic pencil boxes (one per family) in one of my 5" x 7" drawers. Other scrappers store them in zip-style bags (one per person) in a 2" x 2" labeled section in the front of each category drawer.
Photo Storage Boxes
These photo boxes will be referred to as “Cold Storage” from now on. Any photo that doesn’t make it into a photo album or a category drawer goes into a labeled cold storage box. To clarify, if a photo isn’t in a photo album or category drawer waiting to be scrapbooked it’s in a cold storage box for safe keeping. Photos in these boxes probably won’t see the light of day again, but they’re safe in case someone needs them. You also don’t need to organize these photos by date unless you want to; they can be “loosely” filed. These boxes can be stored outside of your studio; in a closet away from heat, light, liquid (leaky pipes), insects, etc. When I started organizing I had over 30 boxes of photos and negatives. Looking for a few photos to scrapbook was less than inspiring. Now, I love to look for what I need because it only takes minutes.
Memorabila
Memorabilia are items, not photos, that you want to add to layouts. They could be maps, brochures, tickets, tags, tabs, labels, buttons, locks of hairs, etc. Some scrappers keep all memorabilia in one box or suitcase, labeled and then make a notation in their location in the notebook or stored with the photos they go with. I have a filing cabinet devoted to memorabilia and family heirlooms. With years of accumulation from both sides of our families I needed enough space.
Note: Be careful with the items you keep for memorabilia. Ketchup and mustard packets or salt and pepper packets probably aren’t going to stay closed on a page through the years. Instead, scan them and put a copy of the item in your scrapbook.
Scrapbooked Albums
Scrapbooked Albums can be stored in one location in your home or throughout your home. Mine are in my family room, living room and studio and are labeled on the spine with "People," "Places," "Things," and "Photos" (photos that have special meaning or connections).

Further Insight on Photo Organization
I started a Davis Family History file when I got married. It’s a chronological document that lists family events by year and month. When I got a computer, I transferred the information to a file there and now I update it a few times a year. When I started using the Photo Freedom approach as part of my photo storage and organization system, I used the history to help make connections and identify photos that turned up. I could look at an undated photo and “guess” the year, then I could look in our history for further clues: school programs, dental appointments for braces, the pets we had at the time, clothing fads, friends, or what was going on in our lives.
The history also helps me with the journaling I add to layouts. I have a tribute layout to the new millennium with photos of where family members were on New Years Eve. Because I’d typed up the event in our history it was ready to add to the layout. The entry says: “January 1 - Welcome new millennium! What a great moment in time to celebrate. We partied at neighbors, Kevin and Rhonda Cook, last night. Drex is working in NYC and called to tell us he had gone to a party in a building near Time Square where a fire broke out a floor above; he’s fine. Mac is going out for pancakes with friends. Kenz and Merek went to parties and then came to the Cooks. They are sleeping in this morning--true teens. My hopes for the new year are health and happiness for the family, and for quick growth for my fledgling company, Scrapbook.com, and Charlie’s company, Law.com.”
Summary
When photos are organized and in a system that makes them easy to find and available for scrapbooking, stress is reduced, and they can be enjoyed by all members of a family.
Your photo and negative dilemmas only need you to decide on a system that will work for you and for you to get started on it. With your organizational system in place and regular photo maintenance and upkeep scheduled, you'll be in charge soon! Good luck!
If you are looking to further enhance your knowledge of photo organization and photo care, check out these two informative articles here and here!
Want to share your photo organization system with others so you can inspire and enlighten? Post your images into the Scrapbook.com Gallery, and don't forget to tag #LifeHandmade and #Scrapbookcom!
This article is part of our free class called Get Organized. To further expand on your craft space organizational skills, sign up and take the class for free here!