


One of my first crafting memories comes from preschool when we created "portraits" of our Dad for Father's Day. Too bad it was well before we could archive those kinds of childhood memories by scanning or taking a digital photo – I would love to see that piece of art again!
Making a handmade work of art for Father's Day is an age-old tradition that doesn't have to end just because you're not a kid anymore.
Whether you're helping your kids make a treasured keepsake, or you're going to pop a handmade card in the mail for your dear ol' Dad, I've got three unique design ideas to get you started.
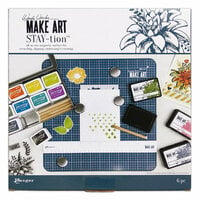
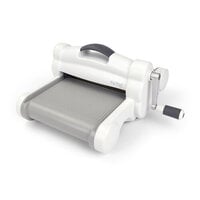
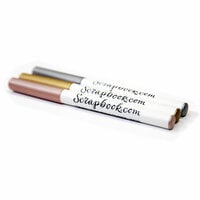
Each of the cards I'll be showing you how to make features the same main supplies, including Scrapbook.com's exclusive photopolymer stamps and hybrid inks. I'm also using the Wendy Vecchi Make Art STAY-tion, a fantastic new tool for crafters that makes some trickier techniques easier to achieve than ever!
See the complete list of products and supplies at the bottom of this post.
Quick & Easy Card For Dad
 This first design is great for kids, beginners, and those that need to make a quick card! All you need is a card base, a Scrapbook.com Jumbo Dauber, two colors of ink, and stamps with an acrylic block. Bonus if you have the new Wendy Vecchi Make Art STAY-tion!
Even with just a few supplies, I came up with a design that was stylish but simple.
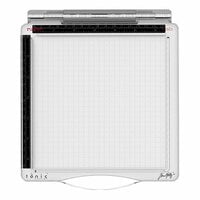
I used the STAY-tion to hold the card base so the magnetic ruler's center mark would hit the center of the card (2 ¾"). Then, I eyeballed the dauber circles, so they were evenly spaced. Having the grid and the ruler really helped me get close without adding any additional guides.
 Then, I was able to keep the card in place with the provided heavy duty magnets while I stamped the center row of circles. I was also able to use the magnetic ruler as a kind of stamp alignment tool to get the sentiment stamped on perfectly straight!
 I was able to get this card done in just a few minutes with a few key supplies! So if you have a long, extended list of dads, granddads, and husbands to celebrate on their special day, this is the card making technique for you!
Masculine Stencil Card
 This design is a step up from the first one. I started with a piece of clean, white cardstock. The star of the show here is the Big Squovals stencil background. The STAY-tion is the perfect way to keep your stencil and cardstock in place. By moving the magnets around as I blended with the Jumbo Daubers in the various shades of blue, I was able to keep everything in place and stencil from edge to edge – no washi tape or masking tape needed!
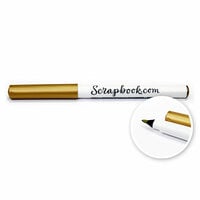
To finish off this panel, I shifted the stencil slightly to the left and then used a Scrapbook.com Gold Opaque Metallic Ink Marker to trace the right edge of each squoval. From there, it was a simple assembly to finish the card.
 I took my card base and added in a layer of dark blue cardstock behind the stenciled panel. I also stamped the sentiment on a strip of Neenah Solar White Cardstock and added a paper "shadow" of kraft cardstock. I then used some foam adhesive dots to add dimension to the card.
 The final look on this card was really unique and classy for Father's Day. The squovals ended up looking like cool gems or stones with the blend of blues and the gold metallic accent. Show your Dad that he's a real gem when you make him a card like this one!
Tip: Did you know that there are collections specifically about those extra special dads? Some of our favorites include Best Dad Ever by Photoplay, Mister by Authentique, and Dad Life by Simple Stories. Check out all the fun dad-themed collections here!
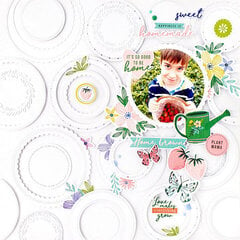
Father's Day Background Stamping
 This was the most involved design of the three. It took some patience, but the results really wowed me! I started with another piece of plain white cardstock and used the STAY-tion to assist me in making an angled sentiment background with the script version of the stamps.
The gridlines on the STAY-tion and the ruler helped me align my sentiments perfectly!
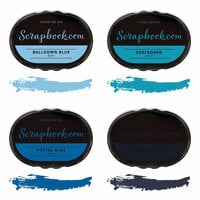
I started from the top and worked my way down so I could see the row above and offset the sentiment each time. I started with the lightest shade from the Blue Group (Ballgown Blue) and went a shade darker every two rows to create a cool ombre effect.
 I wanted to add in some more geometric shapes to finish the design, so I die cut some stitched circles in various sizes.
Like the second card, I got my card base, adhered a dark blue cardstock on top of it, and then my stamped card panel.
To finish off the design, I stamped the sentiment in the all caps print font, snipped out the words, and adhered them to the vellum circle. The vellum is popped up with foam adhesive, which is hidden under the sentiment strips.
I hope you enjoyed my Father's Day design ideas and tool tips and find yourself inspired to create and share handmade creations. Don't forget to share your Father's Day projects in your Scrapbook.com gallery to inspire others to celebrate those extra special dads in their lives!

Looking for some more inspiration for card making? We have some amazing guest blog tutorials for making the perfect wedding cards and birthday cards that you won't want to miss!