This article was written by Jill Davis, Scrapbook.com's founder and craft room organizing expert! She invites you to learn from her craft room organizational methods and concepts, and refers to Stacy Boatman's professional opinions on getting organized. Shop the entire Scrapbook.com store for all of your craft storage and embellishment needs!
Materials Needed To Organize Your Embellishments
- Three different sized containers to hold small, medium, and large embellishments
- Label maker to label containers
- Pen and paper for keeping track of your thoughts
The Challenge of Organizing Your Embellishments
When you decide to sort through ALL the embellishments you've been collecting over time, the challenge will be to properly sort them into a labeled container system that enhances your scrapbooking process.
Sorting through smaller items like embellishments takes quite a bit of time, patience, and persistence. I recommend keeping a pen and paper close by as you read through this article so that you can make notes of ideas that intrigue you. You might not end up using everything you write down, but at least you will have captured the thoughts and insights to read later. You may feel overwhelmed now, but having an organized system in place that will allow for easy access to your embellishments will be oh-so-worth the effort. You’re going to LOVE the results! Get ready to make a LOT of fun decisions as we focus on your embellishments.
Where to Begin When Organizing Your Embellishments
The biggest issue with embellishments is that there are SO many available—different colors, types, uses, storage requirements, etc. It’s nearly impossible to find a single solution that fits everything for everybody. This means it’s going to be okay to choose the path you want to travel, and the solutions that work best for you. What works for your Prima flower piles may not work for your buttons, and it doesn’t have to. All I encourage you to do is to be flexible until you find your best solutions. WHERE your embellishments will be stored, HOW to retrieve them, and HOW you’ll put them away. You’ll be finding homes for your little things and keeping those homes tidy, neat, and functional.

How to Sort and Organize Embellishments
How you scrap and craft will determine the best organizational methods for your embellishments. The main embellishment organizational divisions are color, type, and theme.
To determine which division is best for you, I have some questions for you. When you’re looking for an embellishment, do you often ask yourself, “Do I need something red in this place?” If so, color sorting may be your division! Sort all of your red embellishments in one container, green in another, and so on. If, however, you’re looking for an embellishment and you ask yourself, “Would a button look good in this corner?” then sorting by type may be your style. If you enjoy scrapbooking by theme, you might want themed containers or a combination of all three methods for your system. You don’t have to make a decision right now. Think about it, and picture yourself in your studio using your supplies. Make a decision based on your preferences, storage options, and the amount of space available in your studio.
I think the best way to help you tackle embellishment storage is for you to see as many storage options for each type of embellishment as you can. We’ll go from embellishment to embellishment showing you samples, sharing Stacy’s solutions, sharing alternatives, and then I’ll show you what I do. If you have a solution you’d like to share, be sure to post in our Get Organized Forum or in the comments below! Keep in mind that what you own right now will dictate what you do for storage and organization. For example, if your stash includes a few boxes of brads, then they will easily fit into a small container with many colors of the same item. If you collect brads, you’ll probably need a jar for each color of brad; understand?
Embellishment Storage Ideas
Brands, Eyelets, and Other Colored Hardware
Stacy’s general, run-of-the-mill brads are divided by color and shape into multi-compartment containers. Stacy’s are labeled and stacked in a drawer. When she needs a brad, she finds the right container and uses a pair of craft tweezers to pull out the brad she wants.
Stacy’s large brads go in large glass canister-style jars. Fancy brads are divided up by type (velvet, fabric, stripes, etc.) and stored in small plastic containers. The jars are thick, clear plastic and are slightly shorter than three inches so they sit beautifully in the 3-drawer units from Sterilite. Storing jars upside down makes it easy to see what the contents are.
I sorted all of my her metal hardware embellishments into like-color groups, then sorted the groups into brads, eyelets, and fancy brads within the same color container. I only want to pull out one container to find a green brad. Metal hardware (brass, antique brass, silver, copper, etc.) have their own containers as do miscellaneous items like paper clips, clasps, vintage finds, etc.
Paper and Fabric Flowers
Flowers are beautiful and fun to use, but can become storage nightmares when there’s no system in place to handle the clutter they can cause. I looked at many, many storage solutions before I settled on the one I live with and use. I’m not a gardener in real life, or on my pages either, so my flower collection is minimal and easy to contain. Stacy’s flower stash looks like she’s a master gardener and she explains below how she tamed her unruly collection.
Stacy removed every flower she owned from its packaging (including those in glass jars) and put them in a pile. She sorted all of the flowers into color groups first. She then divided each group into sizes (small and large is all that’s necessary). She stores her larger flowers in glass cookie jars, and her smaller flowers go back into the original glass jars - all sorted by color! These jars are part of her studio décor which is a nice option.
My flowers can all fit into one embellishment bin so my sorting and purging took less than an hour. I sorted ROY G. BIV and put each color group of all sizes into zip-style bags. Flower centers, leaves, and branches are in their own bag. I especially like that all of my white flowers are now in one place so all I have to do when I want to dye or mist one is to pull out that bag and get going. One bin, one quick pass through the contents, works for me.
For organizing flowers that are still in their original packaging, keep your flower collection packages as is, and sort them by color or type. Then, stack them on end in a drawer, pretty basket, or bin.
For smaller collections of embellishments, clipping them up on wire or a cork board may be the best solution.
Keep smaller flowers in their original containers or consider using spice jars. Stacy found a pretty fabric-lined basket and she keeps it in a drawer with her packaged flowers nestled inside. She says it’s easy to sort through the basket to find the right color.


Eyelets
Stacy recommends keeping eyelets stored in the same type of multi-compartment containers as her brads, just placed in a different drawer. Sorted by size first, then by shape, and then by color.
My eyelets are stored with brads and other hardware that are similarly colored in multi-compartment containers. Some eyelets are sorted by size and shape, in smaller containers within the compartments.
Buttons
Stacy loves buttons and loves seeing them almost as much as she enjoys using them! She says she thinks they add fun and color to any space, so she stores hers in glass cookie jars, sorted by color.
Stacy stores her fancier buttons (shaped, wooden, etc.) in the same small jars as her brads in a shallow drawer. She also suggests storing them in shallow bowls or baskets.
My storage and organizational solution for all buttons, and even vintage jewelry, involves an easy and enjoyable way of viewing them. I just love using buttons, and I enjoy looking at them. Hence the prominent display in my studio. My containers give my space a nice boundary (not much room for over-growth) which is good. I found the black wooden lazy Susan at a home décor store, the big center jar at a department store, and the small plastic jars at Scrapbook.com. The color-assigned jars and jewelry jars fit around the edge of the lazy Susan, and the neutrals and vintage buttons go into the big jar in the center. I can see button colors, sizes, and shapes easily and quickly. A vintage slide case in this grouping holds needles and some thread and waxed linen to use when adding buttons to projects. A pair of scissors is stationed here as well.
Explore Vintage Zest's article called (Cute as a) Button Organization to view another great button organizational system.


Rhinestones, Gems, Bling
Rhinestones, gems, and bling can be tricky to organize since some are technically stickers and some are not.
Stacy has her loose gems in multi-compartment containers. She stores each container, along with her packaged rhinestones, in a small milk crate. The crate goes on a shelf.
I store my gems by color in their color-respective embellishment bins. I have a “Clear Embellishments” bin so all clear bling goes in there (rhinestones, crystals, chandelier pieces, transparent overlays, etc.) I keep gems in their packaging so they don’t get ruined (if they're arranged in designs with adhesive backs). Loose gems are contained in pencil boxes I found at a drug store in the office and school supply section.
Miscellaneous Embellishments
For all those little things that really don’t fit into any category (wooden pieces, photo corners, metals, sequins, acrylic pieces, and glass slides), Stacy uses the same small containers used for her fancy buttons in larger plastic drawer containers.
My journaling supplies and other miscellaneous vintage embellishments are sorted by how I will use them. Embellishments used most often are in a vintage strawberry carrier next to my workspace. Items used occasionally are stored nearby in embellishment bins. I could have placed all of the consumable journaling embellishments in their corresponding color embellishment bins, but I didn’t want to dig through each of the bins to find what I needed. Digging through one or two open boxes is much easier. A strawberry carrier with baskets or an open tool box is a great place to store organized Project Life parts and pieces too.


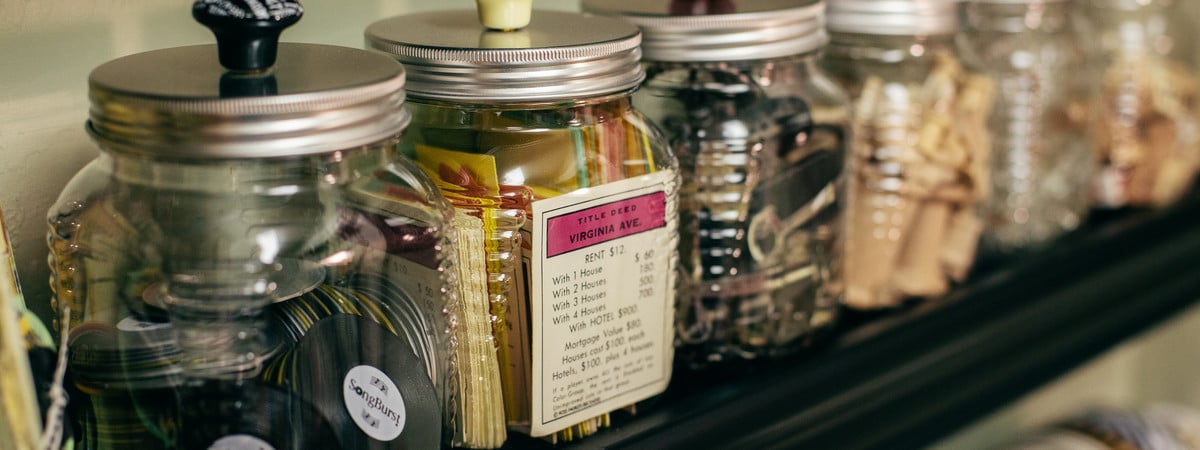
Wall-mounted ledge-style shelves hold more vintage-looking jars filled with vintage and modern trinkets (game pieces, clothes pins, keys, etc.), and there's even room to display some mini albums. I have several vintage ephemera embellishment bins that hold bingo cards, old ribbon, trimmings, maps, tickets, time cards, postage, stamps, etc. I also have a vintage Lifesaver store display that now holds vintage game pieces in jars on the top shelf, and yes, rolls of Lifesavers for my visitors and grandkids on the bottom shelf.

More Embellishment Organizational Insight
Each container in my studio was selected for a specific purpose and yours will be too. I’ve purchased and used plenty of organizational “duds” for my embellishments in the past, but my current system and containers make me very happy and are efficient. However, I am wise enough to know that my storage solutions are subject to change as I grow and this marvelous industry matures and grows. We’ve all seen pictures of studios that have beautiful décor pieces used for embellishment storage--they are intended to look like part of the room décor. I don’t think it is always easy to accomplish this look, because there isn’t a one-stop-shop for crafting and art supply storage. However, it is possible to find containers you’ll want to look at and use that won't cost you a fortune.
It is also possible to have embellishments and tools that look appealing and are functional in their containers. Try to keep these concepts and your personal taste, style, budget, and work habits in mind as you plan for embellishment storage in your studio.
General Storage for a Variety of Small Embellishments
- Embellishment Boxes
- Glass or Plastic Jars
- Small Zip-Style Baggies
- Empty Film Canisters
- Spice Jars on Spice Racks – revolving, magnetic, or wall-mounted
- Multi-Drawer Chest
- Photo Storage Box
- Tackle Box or a Travel System
- Tilt Bins
- Floss Organizers
- Zippered Plastic Bags
- Jewelry Boxes
- Watchmaker Cases
- Stackable Storage Cases
- Rolling Carts
- Compartmentalized Boxes in a Variety of Sizes
- Pegboard or Slat Wall with Hanging Bins
- Round Caddies
- Pill Boxes
Find many of these items and more on Scrapbook.com!
My Embellishment Storage Foundation
I found my bookcases many years ago, and we've been very good friends since. While I wish they were black, I keep them as they are because I’d rather put the time and money needed to renew them into other enjoyments. Their shelves are adjustable and sturdy, and they are trusted workhorses.

Muslin Covered Wire Embellishment Bins
I purchased my bins many years ago and I store most of my larger embellishments in them by color and type. The bins have a metal frame and metal grid bottom for support. Before I dyed them, they had a natural muslin cover. There was also the same natural muslin covering a piece of cardboard that covered the bottom grid which was kept in place with velcro. I was able to remove the cardboard piece when I dyed the bins. The cardboard would’ve never survived being submerged in water. I opted to dye these cost-effective bins because they now blend with and complement the vintage décor in my studio.

I made labels for my embellishment storage bins on my computer and slipped them into the see-through holders. The bins are in ROY G. BIV order on the shelves (including, pink, aqua, black, brown, white, clear, multi, metal and vintage). There are two bins for each color, e.g., Red Embellishments and Red Ribbon. The bins are open so I can dig and find what I need. I chose open bins because I don’t want barriers to entry when retrieving and replacing contents; it has to be easy and efficient. I use additional bins to store secondary tools and supplies in other areas of my studio.
 How to Dye Muslin-Covered Wire Bins
I made a solution of fabric dye and hot water using the instructions on the bottle of the dye. I mixed them in a large tub so one canvas bin could fit inside. I soaked the bin in the solution (rotating it back and forth so the solution covered all sides and the bottom) until the fabric was saturated with color. I let the excess ink drain off and I then set the bin out to dry on our lawn. There are light grass marks on the bottom where the grass touched the fabric as it dried. I don’t mind because they don’t show when the bins are on shelves. Also, I had more than 25 bins to dye in very hot Arizona weather. The fabric dye I used isn’t permanent, so the clean up was easy, but the bins could bleed if they ever get wet. That’s not likely to happen in my studio.

Brads, Eyelets, and Other Metal Hardware
In the past, I’ve stored hardware (brads, staples, eyelets, paper clips, and little do-dads) in jars, plastic mini-drawers in cabinets, and now they’re in plastic compartment containers with hinged lids. The drawers were great, but the cabinets they fit into took up too much valuable wall space. I loved that I could open a drawer, dig for what I needed, and close it. However, when grandkids graced my life a few years ago, I needed my little things to be safe from curious hands - hence the compartment containers with attached lids. I keep these labeled containers on shelves out of the reach of toddlers and preschoolers. I use Tim Holtz embellishments regularly, so I keep them together in larger Art Bin storage solutions so I don’t have to search through several other containers to find what I’m looking for. They have removable dividers that offer a variety of compartment configurations. An attached lid that’s opened can be cumbersome and take up extra space on my island top, but I love that it’s attached and isn’t going to get misplaced.
The compartment container labels were created on my computer and run through my Xyron Sticker Maker so they would stick to the plastic. They were covered with clear packing tape to preserve them. Containers are arranged in ROY G. BIV order and some are by type of
embellishment (fasteners, vintage finds, Tim Holtz hardware, etc.).

We Are Wise
My studio started in a closet, moved to half of our home office, then to a corner in our family room (where it needed to be behind cupboard doors to keep the room from looking cluttered). It has ended up in a spare bedroom and it must stop there. That’s wisdom. I had to be brutally honest with myself when I planned my studio. I wanted to be true to my “style,” know what I like best, and what makes me feel most comfortable. I have become wise as a scrapbooker, and so have you. We save money when we apply our knowledge because we don’t buy on impulse, nor do we listen to hype that tells us something is beautiful when it isn’t to us. Remember how there will be morphing within a studio as new product and supplies emerge? Oh be wise, you know you are. Deep down, know what you want to surround yourself with and what your style is. Let that keep you from purchasing materials you won’t use or following trends and fads. If you are unsure of what your crafting/scrapbooking style is, take the time to read Scrapbook.com's article, How to Find Your Scrapbooking Style.
Tip: Embellishment containers can be utilitarian or decorative, so take a few minutes in your space and imagine your room with some of your favorite looked-at embellishment containers in place. Do you need something new or can you re-purpose things you already have?
Tip: Keep all embellishment containers in the same general location, creating an Embellishment Center. You’ll have only one location to remember and few steps to take when hunting.
Tip: Have a nice bowl on your workspace designated as a “catch all,” or “quick clean up” container. It will be for loose embellishments you don’t have time to put away while you're working on a project. Because it will be a pleasure to look at, full or empty, it won’t look like clutter. The amount the bowl can hold is fixed, so you’ll be more inclined to get it emptied before it looks out of place in your clutter-free space. You can also set a guideline to clear it out once each week, or monthly.

The scrapbooking industry is constantly changing. One year you can find white storage everywhere, and within a few months it’s gone, never to return. I bring this up to encourage you to think about this when you let yourself dream about your ultimate space. What you come up with is a good guide. Your dream and plan are both adaptable and can change as you progress through this challenge. I’ve learned to look at the big picture and plan for growth in my space, and also to give myself limits on how much I can bring in. Remember how I encouraged you not to run out and purchase new containers right away? I think you can see why now--you might have ended up returning them to the store, or be stuck with something that doesn’t work. Be thinking about your decorating theme, and how you want your space to look and feel at the end of this journey.
I’ve learned that some people are comfortable in a utility work environment, while others want their space to feel homey and lived in. Many want their spaces to be an extension of their home; with furniture that doesn’t look like its ever seen paint or adhesive, while others want to bring memories and distressed objects of the past into their space for vintage influence and charm. Whatever helps you relax, get motivated, feel passionate, or get down to business is what will work for you. It’s easy to look at another person's craft space and wonder if it will work for you. However, it’s not until one honestly looks at what REALLY works for oneself that the creative process opens up for great storage, furniture, or accessory solutions. I know I like solid structure mixed with vintage nostalgia, so that’s what I surround myself with in the space I spend during most of my workdays. What do you like and want?
When making decisions about how to organize and store your embellishments, I encourage you to picture your dream space. If you still need more options, visit our Get Organized forum at Scrapbook.com and/or read Scrapbook.com's article called How to Brainstorm Your Way to Your Dream Studio. You’ve probably tried many storage and organizational options before that didn’t work, so now you know not to even consider them moving forward. If the amount of embellishments you own is growing, then you’ve probably outgrown the containers you have, and you know to cut back on purchases, or buy larger containers you can grow into. Ask yourself what solutions will honestly help you attain the studio of your dreams.
Do you go to crops a lot? Cross off any system that won’t travel well, and only focus on what will. If you need to have your embellishments be mobile for totes, but on shelves when you get home, then you’ll have some fun solutions to figure out. The time you put into assessing your needs will pay off.
Summary
Keeping systems and containers simple helps you function with ease in your space. If you need a brad, there should not be several obstacles in place to find one. Things in your space should be easy to find, use and put away. Your space will be more clutter and stress-free when embellishments are organized in containers and the system doesn’t resemble Fort Knox. You’ll soon be in control of all brads, eyelets, buttons and any other embellishments you own. Gone will be the days you’d rather vacuum up stray embellishments than picking them up and putting them away. Keep taking your baby steps, you ARE getting somewhere... And soon, you’ll be striding!
Like This Article? Then You May Also Like...


If you enjoyed this article, then you'll love our free class, Get Organized, which this article is based on! Become an organizational craft room guru when you learn step-by-step the ins and outs of true craft room organizational nirvana. Go for it, and sign up for Get Organized today!