


This article was written by Scrapbook.com founder and organizational expert Jill Davis with some concepts developed by and shared by Stacy Boatman. With Stacy's help, we've included some of her concepts and experiences in this article. You can also take the full, free class with multiples lessons and detailed photos. And, if you need them, you can get craft storage products here at Scrapbook.com to help.
Materials Needed for Creating an Idea System
- Notebook
- Album or card file
- Super comfy chair
The Challenge of Developing an Idea System
To get all paper ideas, digital ideas, and sketched out ideas into a system that keeps ideas into a system that is accessible and easy to maintain.
How to Generate and Find Ideas
Outside of our minds and intuition, ideas often come in two more immediate forms: Print and digital.
- Print form includes magazines and books.
- Digital form would be like an online gallery.
When setting up your idea system, you can go ALL print, ALL digital, or a combination of both. You can also print digital ideas and add them to your idea files. It really depends on how you scrap, and if you have access to a computer when you’re scrapping. If you don’t, you may want your ideas in print form. If you have more room on your hard drive than in your studio, or if most of your inspiration comes from online sources, then digital may be the way to go.
Organizing Ideas
One of the best ways I’ve found to organize my ideas is to do so by category. This will work in both print and digital formats. Some possibilities for themes include the following: Titles, journaling, photography, layouts (theme or by number of photos), quotes, tips and tricks, tags, borders, techniques, color, design, embellishments, cards, borders, matting, etc... You can have as many categories as you want as long as you know where to go for each idea you store. You’re the best judge of how you organize because you know how your mind works. One caveat: Do NOT have a “miscellaneous” category in your system. It will become a catch-all for undetermined content and be useless, because you’ll rarely reference it!
Where to Store Ideas
Consider storing your ideas in books that you place next to a comfy chair. The chair can be in your studio or somewhere in your home where you want to sit down to browse. They can also be stored near your workspace.
If you decide to store your ideas digitally, you’re set to use your computer! If you go with organizing in print form you'll have more options to choose from.
- Put ideas into three-ring binders, with or without page protectors, divided into categories. Mount copies onto note cards and store in a storage case or Pioneer Photo Video Box.
- If you save magazines, use upright magazine holders.
- Mount pictures from magazines, or prints from online, in a handmade chipboard album with dividers and paper pages.
- Tack pictures on a large cork board or "inspiration board."
Tip: Choose your organizational method not only by how it will fit in with your space, but also by how you tend to look for ideas.
Finding and Organizing Ideas from Magazines
Let’s address magazines and what can be done with the ideas you find in them. There are three camps of scrappers on this subject:
- Those who tear out ideas and toss the magazines.
- Those who either flag the articles in their magazines, or are so familiar with them they know every article and idea.
- Those who keep the magazines whether or not they’ve looked at them in the last few years, but are petrified to toss them.
If you fit into the third category, consider the fact that your bookcases are full of magazines (and books) and those shelves could be holding scrap supplies and albums instead.
If you decide to keep your magazines, one organizational option might be to organize the ideas you like using colored, sticky note references that stick out from specific pages. You could assign each color of sticky note a topic, flagging layouts or articles accordingly. This is probably the best of both worlds; keeping magazines with your ideas organized inside! Most magazines offer a yearly reference at the end of the year. You could use this reference as your guide (highlighting desired ideas within) instead of using a sticky note tagging system.
Stacy and I personally prefer tearing ideas out of magazines to file in our idea storage systems. We find it is much easier to flip through our books full of favorite ideas, than to look through several magazines that contain only a handful of things we might be looking for. Even though it takes a lot of time to set up our systems, we recoup those hours by not having to search anymore. A backlog of years and years of magazines to go through is no small organizational task. But once you sort and get organized, you’ll have another amazing system in your studio that will save you time, so you can scrapbook more. Just keep in mind, that whatever your organizational decision is this week, the aim is to clear out clutter and get an idea storage system in place.
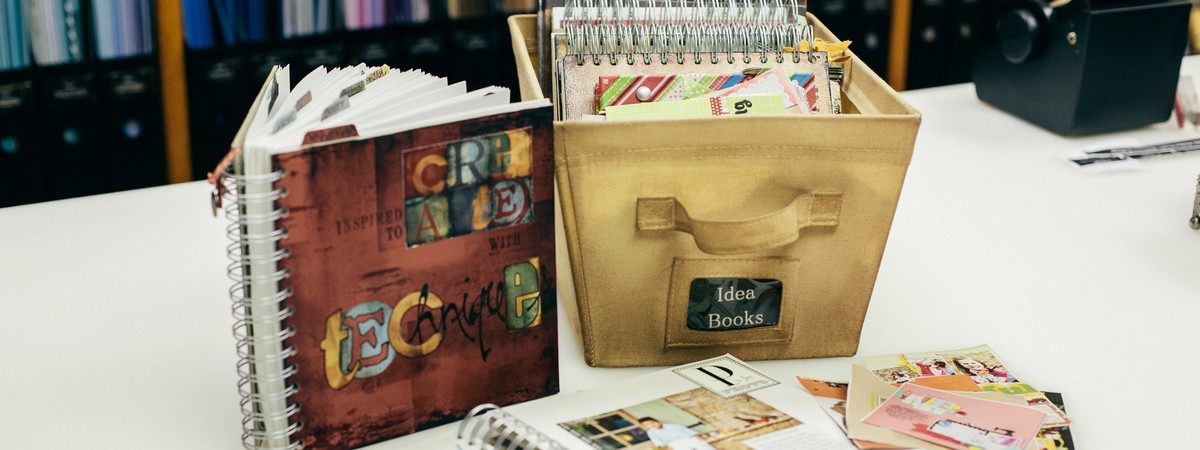
I have a collection of handmade idea albums that I made to house my clipped ideas. I go to them when I want to sit in my comfy chair to get inspiration. I also go to my computer for online ideas.

My albums have chipboard covers, and plain paper pages inside. I purchased these albums, but they could easily be made using the Cinch Bindery Tool - Version 2 by We R Memory Keepers. I don’t have page protectors in my idea books because that is just one more barrier to keep me from getting old ideas out and allowing new ones in. I’m not in these books enough to worry about wear and tear on the contents. I use re-positionable adhesive to attach the copies to both sides of the pages. By doing it this way, I can remove old or used ideas to make room for the new.
If I don’t have time to process my ideas into my system right away, I tear the whole page out of the magazine and place it in the back of the storage bin where I keep my idea books. It's safe there until I can process it, and it’s not in a pile on my desk creating clutter.

Published Idea Books
One nice thing about published idea books is that they don’t HAVE to be stored in your scrap space. You can place them throughout your home. But how do you keep track of your favorite ideas that are inside them? You can leave them as they are, flag them with sticky notes, scan them to store in your computer, or print them out for your idea files. You can also make a master list that states the book, idea, and page number.
Both Stacy and I chose to get rid of most of our idea books during this challenge, only keeping those that were full of topics and/or techniques we were interested in. When we found ideas we loved, we noted each idea, and got it into our idea files or handmade books.
Stacy scanned the ideas she liked, and edited the scans to fit onto 4" x 6" note cards. She printed them and filed them into categories. Her system has three parts: layout ideas, general ideas, and card ideas. Each part has its own three-ring binder. She uses scrap paper, cardstock, and notebook paper to glue her cut-out ideas in. She’s able to add as many pages as she needs to her files. Stacy is very selective about the books she buys now, because she doesn’t want to be stuck at her scanner for hours and hours.
After 14 years of scrapbook idea books and magazines coming across my desk, I too have become VERY selective about the ideas I save for my idea books. As my style has evolved, and my needs have changed, I’ve learned to only keep ideas that are fresh and/or timeless as references. Once I use an idea on a layout, I remove it from its idea book since I can access the idea again from the scrapbooked layout.
I used to have a collection of books about scrapbooking and scrapbooking ideas. They took up valuable space in our bookcases, and they weren’t being used to their full potential. When I decided to dejunk during this challenge I went through each book. If I found a picture of something that absolutely took my breath away, I carefully cut it from the book. I then trimmed it and glued it into its respective idea book. I have an agreement with some scrapbooking buddies that I pass my cut-up books on to them, and they pass theirs on to me. I've become wiser about book purchases because of this challenge.
The following are the titles of my handmade idea books:
- Projects
- Words - alphas, lettering, titles, journaling ideas
- Layout Design - layouts
- Embellishments - accents and hardware (not ribbon)
- Ribbon - twine, fiber, and other
- Techniques
- Photos
- Color
- Sketches (in a repurposed photo display—see below)
Tip: I store my digital ideas in my account at Scrapbook.com. I can tag favorite layouts, projects or cards and drop them into my organizational system (you can make your own categories) and it’s there for easy access. I don’t have to use space on my computer, and I have instant access to my ideas, 24/7 from any computer, smart phone, or tablet device. This is a fabulous resource when I crop away from home.
Storing Your Sketched Ideas
I love to use repurposed items in my studio. I wanted a unique place to store my favorite sketches, so I kept my eye out for something I’d enjoy having near my workspace. One day I found a flip-style, tabletop photo display at a thrift store. I removed the photo sleeves and repainted the base. Then, I made front and back covers and added tabbed dividers and pages I’d cut and hole-punched to fit onto the base.
This display stand serves as a primary tool. It holds photocopies of favorite sketches that are grouped behind tabs by the number of photos on each sketch. Sketches I find online and/or in magazines, along with drawings of favorite layouts I design or “sketch," get added to this display stand . They are attached to the front and back of the pages with re-positionable adhesive. I can get to my sketches quickly to look at them as I work. The cards don’t get lost on my workspace, because the display is easel-style with pages attached. Sketches have to be "absolute favorites" to make it into this organizer. When I need a quick idea for a layout configuration, I simply flip through my sketches and get to work.

Summary
Ideas shared by others for layouts, cards, techniques and projects can help you with your own creative processes. Having a place to store your favorite ideas helps you keep order in your space. Looking at those ideas can help your style flourish, aid in the flow of inspiration, and make scrapbooking more enjoyable.
Congratulations, your scrapbooking ideas will soon be focused into an amazing organizational system. Think about how good it will feel to have your favorite ideas in a useable, neat, and orderly system.
My categories in my Scrapbook.com account are the same as those found in my handmade idea albums e.g., layout styles, albums, projects, home décor, themes, techniques, embellishments, cards, colors, number of photos, size, etc. Because my system is in place, it’s easy to add something new when I find it in the Scrapbook.com Gallery. You can also tag your favorite resources, tips, quotes, and articles found at Scrapbook.com in your account for future reference. If you haven’t been using this free feature at Scrapbook.com, please consider doing so.
If you are looking to further enhance your organizational craft space organizational skills, check out these two informative articles here and here!
Want to share your idea organizational system with others so you can inspire and impress? Post your images into the Scrapbook.com Gallery, and don't forget to tag #LifeHandmade and #Scrapbookcom!
This article is part of our free class called Get Organized. To further expand on your craft space organizational skills, sign up and take the class for free here!