


My friends Will and Emily are getting married very soon and they asked me to create a guest book for their special day. After brainstorming with them, we came up with an unconventional take on the traditional guestbook.
Instead of having a book, I made them a display to set up at the wedding that included pens and cards in two sizes, 4” x 6” and 3” x 4”, for guests to write on. After the wedding is over and they return from their honeymoon, they will have the opportunity to print their photo booth photos and include them in an album with the well wishes of the guests written on the cards. Essentially, they will have a scrapbook that includes a guestbook.
Here is what the display looked like when completed:

I purchased a kraft desk organizer and embellished the front with a banner and the top with a pennant banner using skewers.
Here’s a closer look:


And a look at the cards:


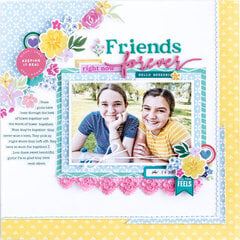
Here is the album cover:

and the first page of the album:

To create this type of a guestbook you will need:
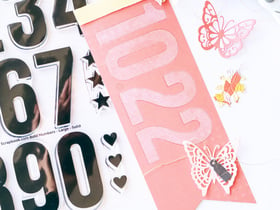
- - one 12” x 12” patterned paper pad cut into 4” x 6” and 3” x 4” cards (I used Dear Lizzy Lucky Charm Collection)
- - one pack of white 12x12 cardstock
- - stamps
- - embellishments: stickers, sticker flags, title cards, etc.
- - ink: navy, pink, light blue
- - album
- - page protectors
To create the cards for this project:
- - Cut your 12” x 12” paper pad into 4” x 6” and 3” x 4” rectangles. I cut 60 4” x 6” rectangles and 200 3” x 4” rectangles. Round all the corners.
- - Cut your white cardstock to 3 ½” x 5 ½” and 2 ½” x 3 ½” and round the corners. Cut the same quantity as the patterned paper.
- - Adhere the cardstock to the patterned paper.
- - Stamp on the cards with all the fun stamps you want. I used a variety of colors and designs.
To create the organizer/holder:
- - Purchase a holder you think reflects the couple. I purchased mine at Target in the kraft color.
- - Cut triangles and pierce holes in the top corners. String bakers twine through it.
- - Glue skewers into the corners of the holder and string the banner across the top.
- - For the front of it, cut nine banners and string them onto bakers twine.
- - Glue the banner across the front of the organizer.
- - Hand cut letters and glue to the banner. Mine says “W+E=” followed by a heart with “forever” written in the middle.
- - Add pens to one of the slots and cards in the rest of the slots.
- - Next, slip in some of the leftover papers into the page protectors in the album and present the album and organizer to the bride and groom to use on their special day.
I hope I have inspired you to consider creating this special keepsake for a friend or family member in the future.